How to Replace a 98 VW Golf Front Bearing

July 7th, 2007 38 comments

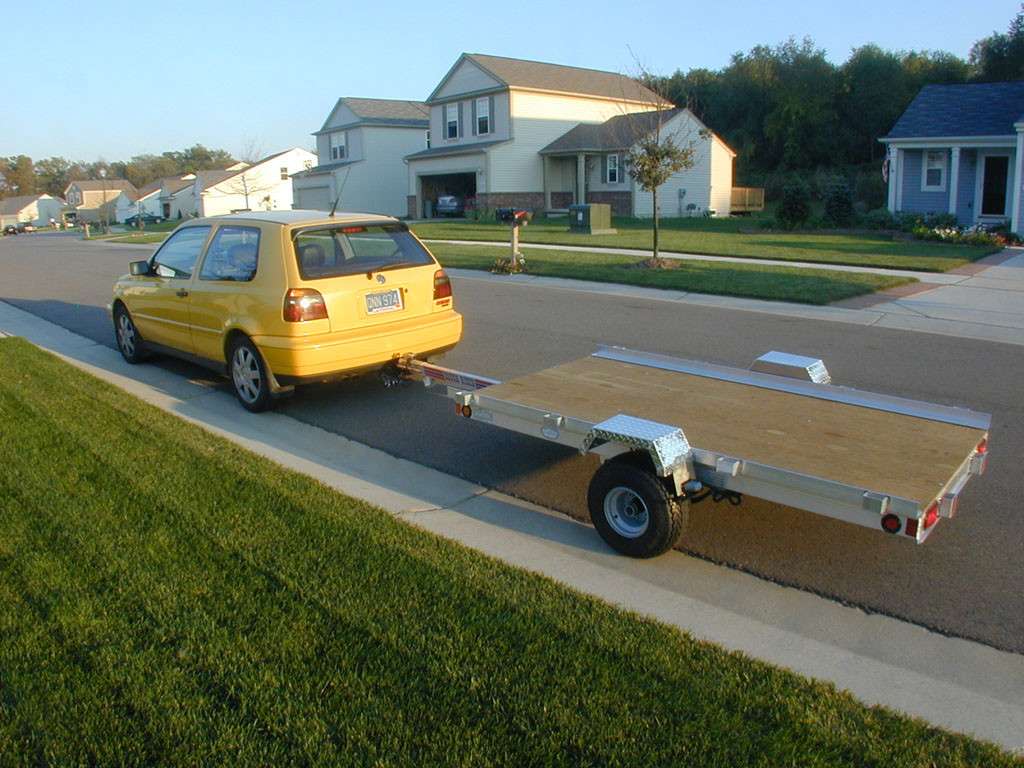
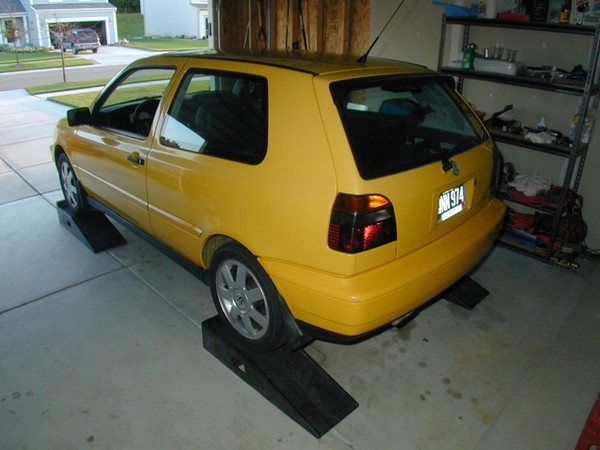
My 1998 Volkswagen Golf GTI VR6 has been an awesome car, but things are starting to fail after 150,000 miles.  This is the procedure I went through to replace the right front bearing recently.  The left front bearing died at 130,000 miles.

It is important to know whether your vehicle has a PLUS SUSPENSION. My 98 VW GOLF GTI is a “special edition” model which came with this. You will not be able to remove the hub on a VW with PLUS SUSPENSION without a hub puller AND you will not be able to reinstall the hub without the axle puller tool. The axle/hub splines are compressed on the PLUS SUSPENSION to eliminate backlash.

I don’t know how many VW’s have a PLUS SUSPENSION, but I guess it is not as common. The intent of the compressed splines was to completely eliminate backlash.

I needed a few specialized tools to replace the bearing.  You gotta have the right tools for the job.

This tool is a tie rod ball joint separator.

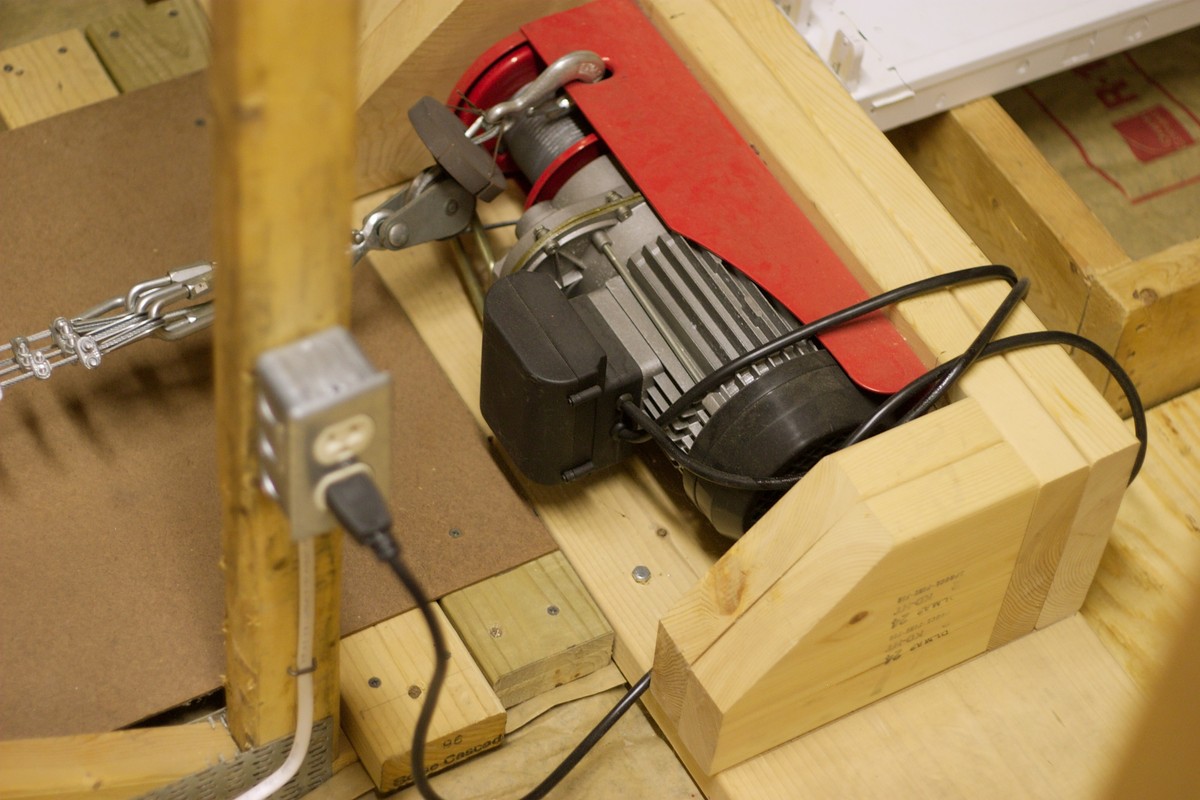
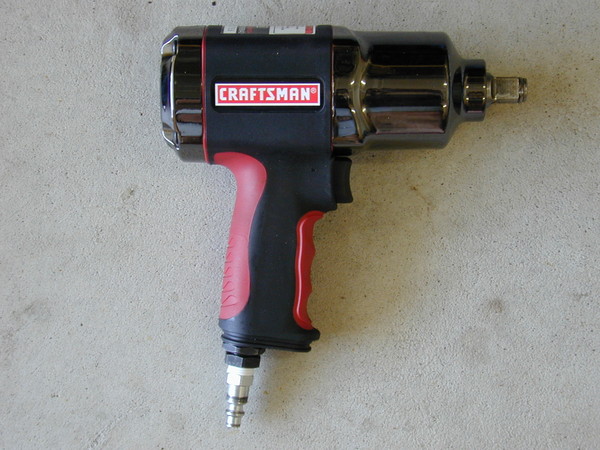
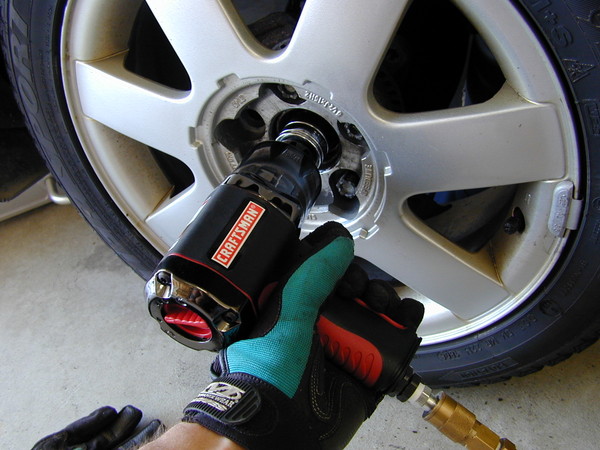
My new favorite tool… the air impact wrench.  My old one had 165 ft. lbs of torque.  I can’t believe I hesitated when buying this one with 585 ft. lbs of torque.  It saves a lot of time and headache.

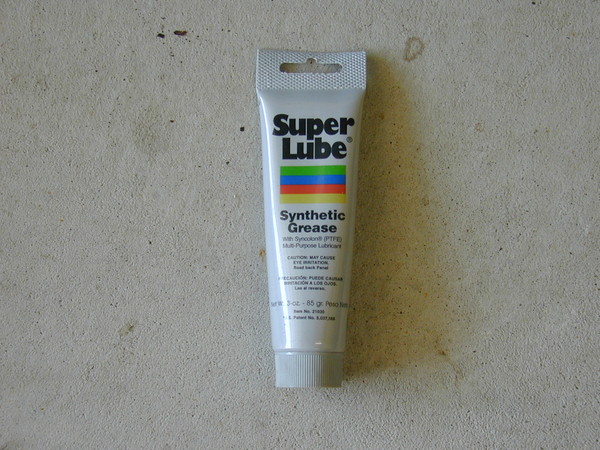
A quality grease is very useful.

An impact screw driver is a must for stubborn screws.  Otherwise you will just strip them.

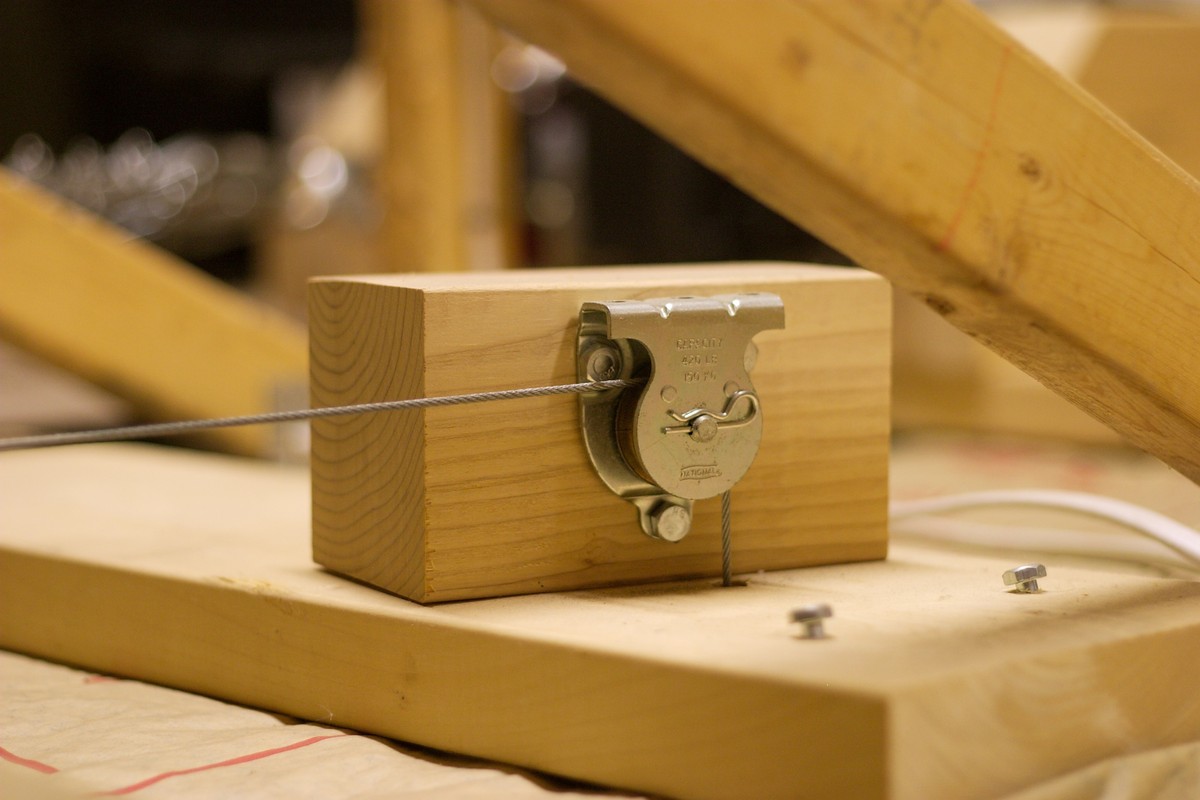
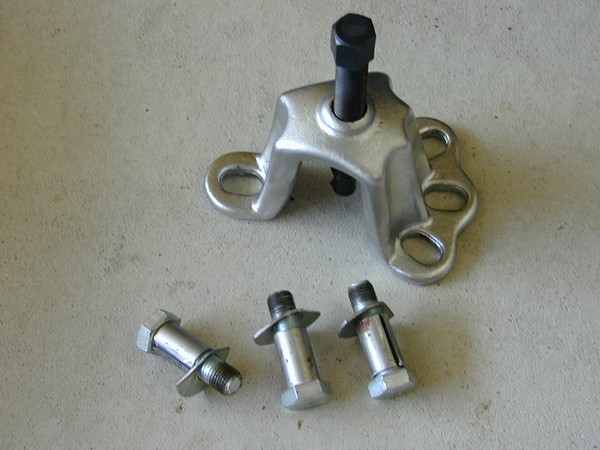
Drive axle hub press (modified).  I didn’t want to pay for the expensive VW tool, so I bought this generic model and I had to modify the bolts with special washers and standoff sleeves.
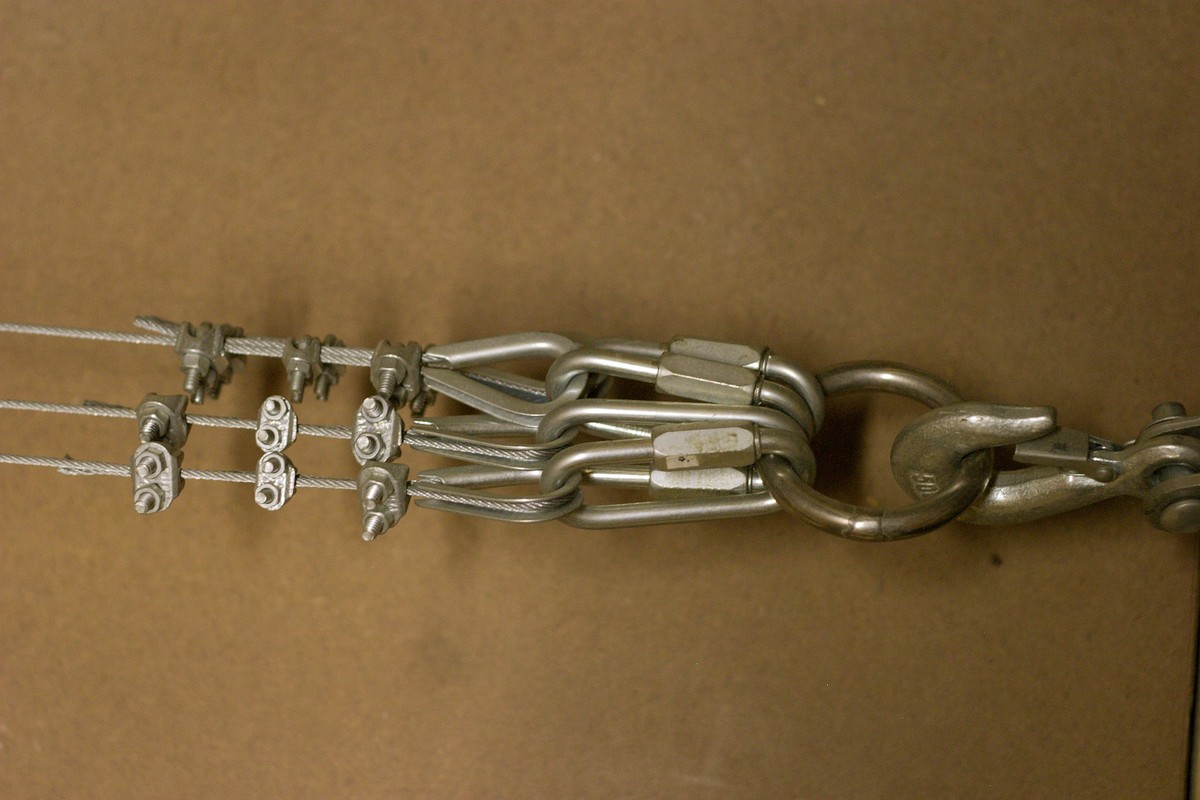
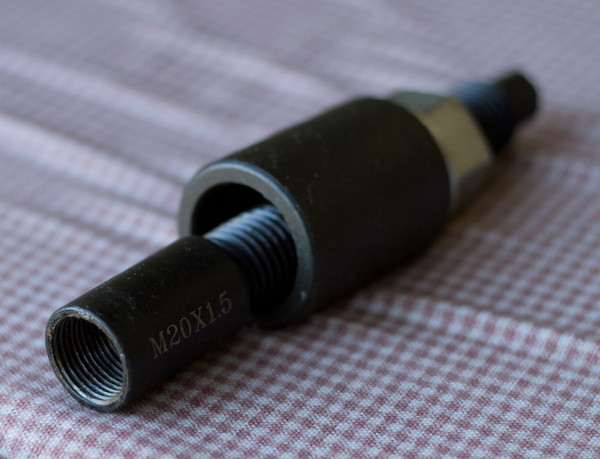
Axle puller.
When you are reinstalling the hub… this tool helps pull the hub back onto the splined axle.
You thread the inner part onto the axle and you tighten the silver nut which pushes on the loose outer cylinder of the tool.. which presses against the hub.
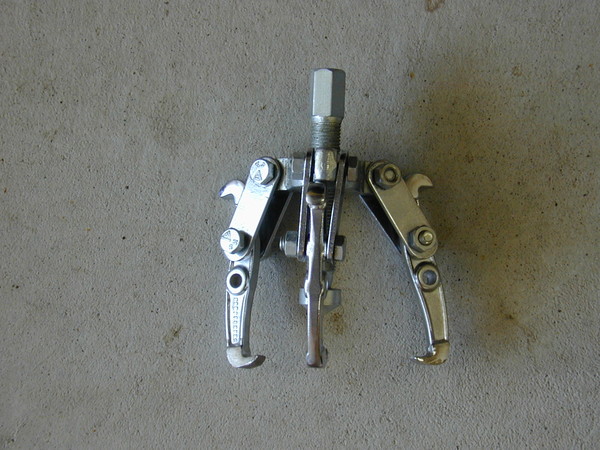
Hub puller.

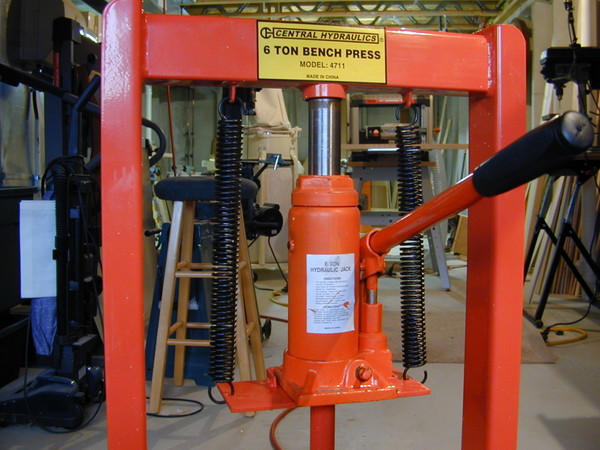
6 ton bench press.  Got this at harbor freight for $60.

This completes the list of special tools needed to replace the front bearings on my golf.  Of course, you’ll also need lots of wrenches, sockets, and typical garage tools as well.

If you don’t have all of these special tools, don’t even attempt to replace your VW golf front bearings.

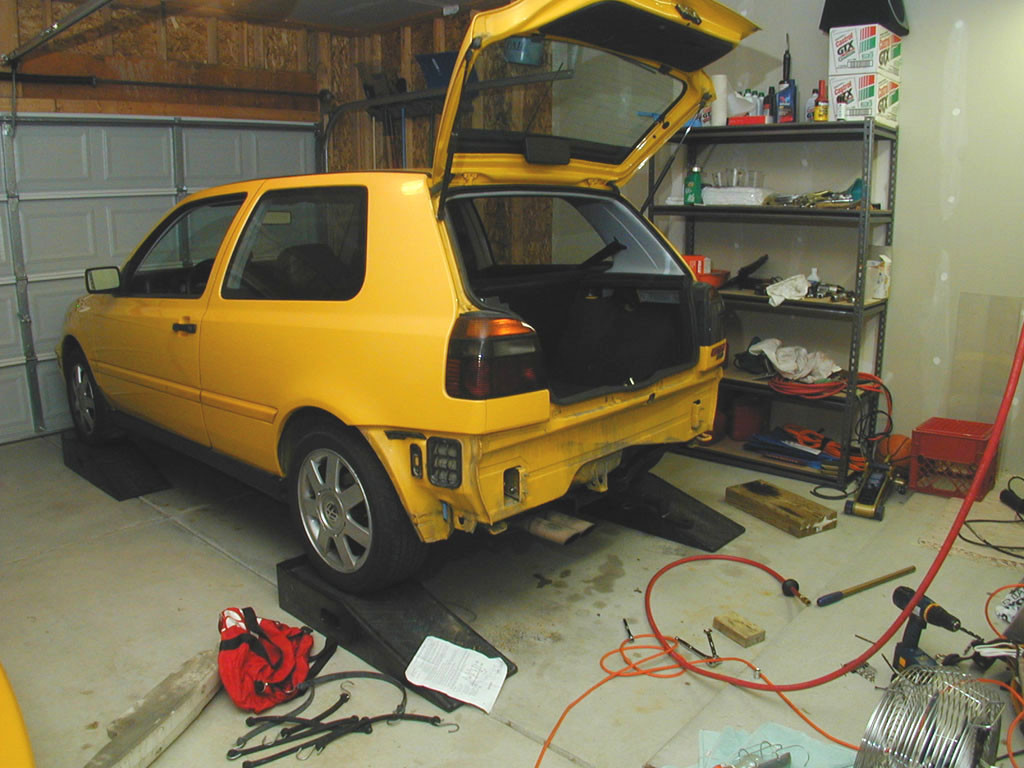
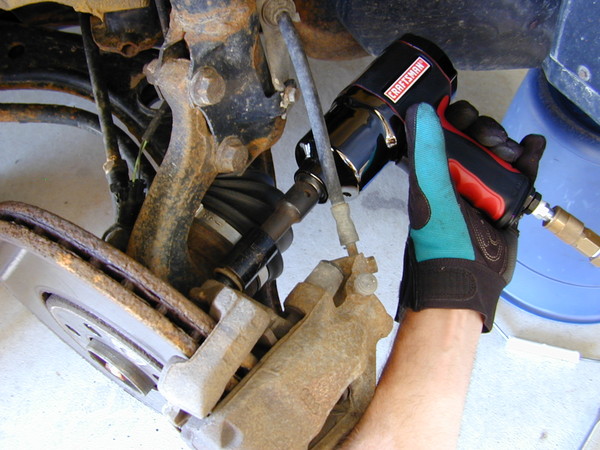
First thing after jacking up and removing the front tire… is to press the hydraulic brake caliper piston back enough so that you can easily remove the caliper assembly.  I use a bolt and a screw driver at this location as a lever.

2 bolts hold the caliper to the wheel knuckle.

This bucket is the perfect height so I can rest the caliper without putting unnecessary stress on the rubber brake line.

Now remove the single screw that holds the brake disc to the hub.

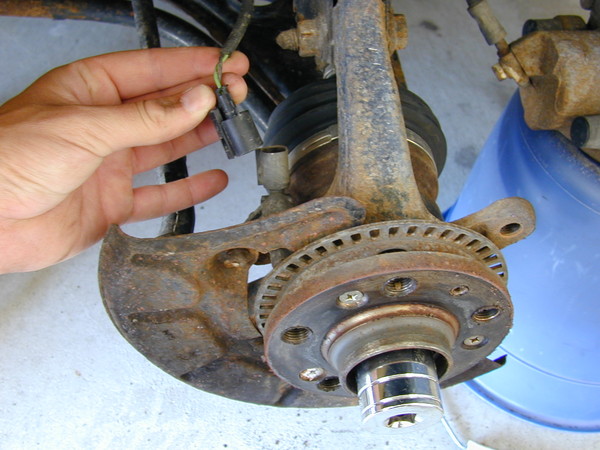
Disconnect the ABS brake sensor.

In order to loosen the axle nut… you need to put the wheel back on and lower the tire, so that the torque stress imposed on the nut is not transferred to your transmission.

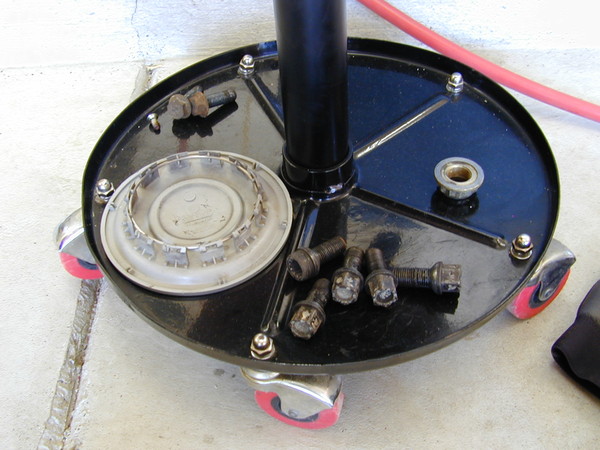
It’s important to keep your nuts and bolts organized.

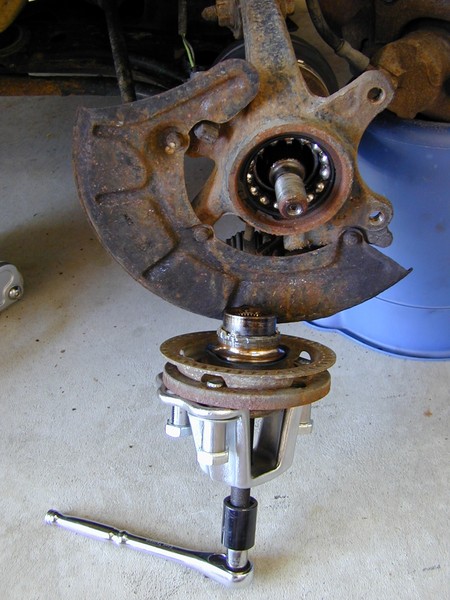
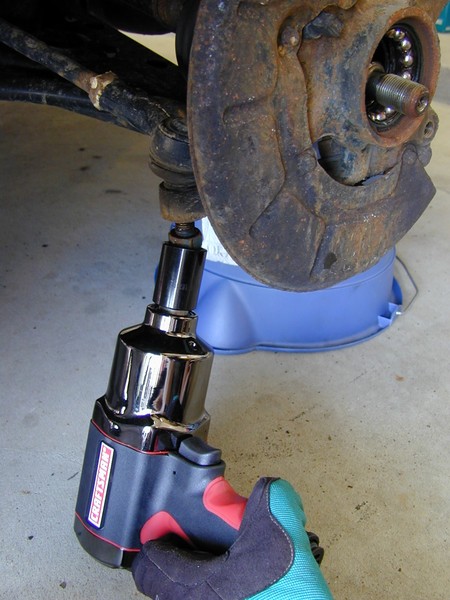
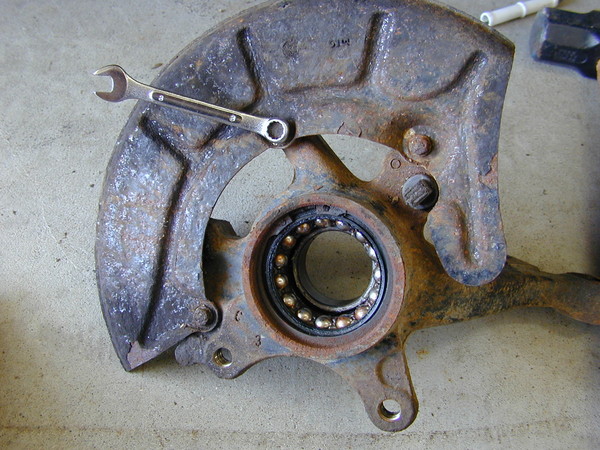
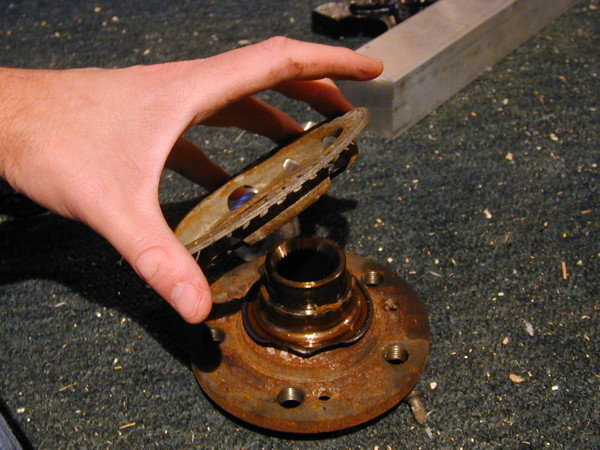
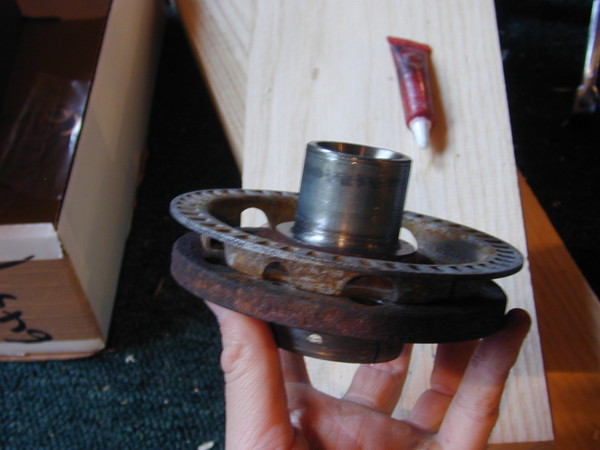
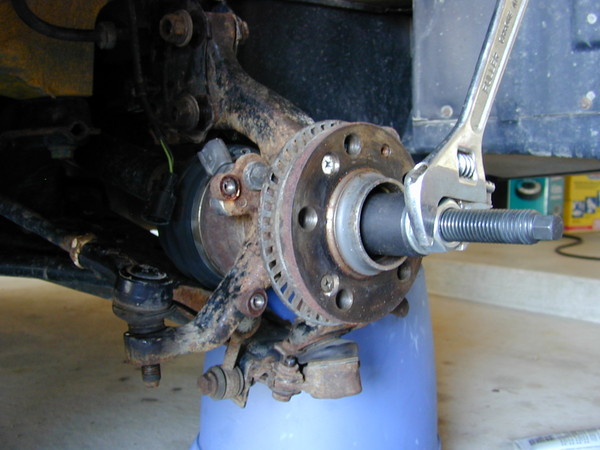
Now you can pull the hub off the axle.  I greased the tool threads and tool tip and things went much smoother.

Here you can see the hub with part of the bearing stuck to it.  (I remove it later).

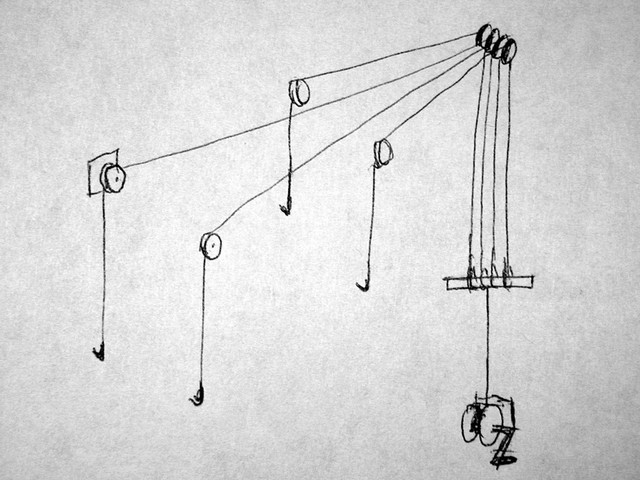
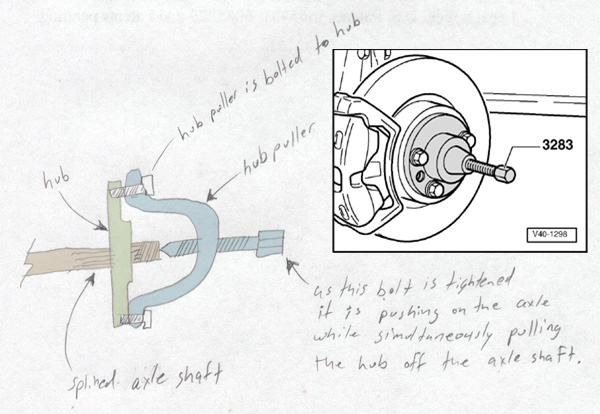
Here is a diagram of how the hub puller works to pull the hub off the axle shaft.
As the hub puller bolt is tightened, it is pushing on the axle shaft while simultaneously pulling the hub off the axle shaft.

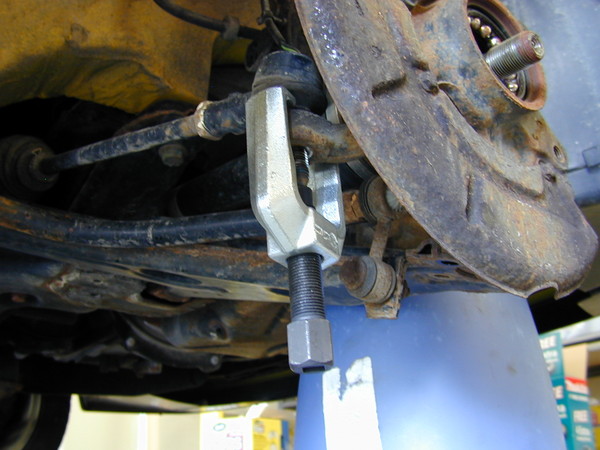
Unbolt the tie rod end.  If you attempt to use a hand wrench the bolt may spin with the nut.  A powerful impact wrench will save you some headache.

Use this special tool to press the tie rod end bolt off.

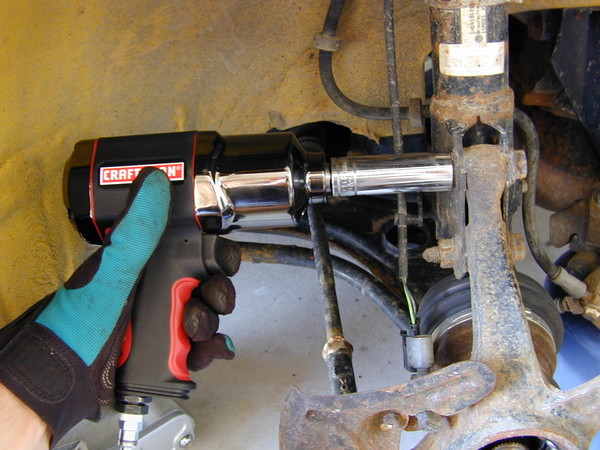
The bottom of the knuckle is attached to the lower ball joint which is attached to the arm by 3 bolts.  I used the angle impact wrench to remove these.

You need to compress the spring before you can remove the knuckle assembly.  This spring compressor was cheap from harbor freight.  I had to modify it so I could invert them by welding the nuts on the end of the screw.  That way, I can quickly compress the spring with a power tool.

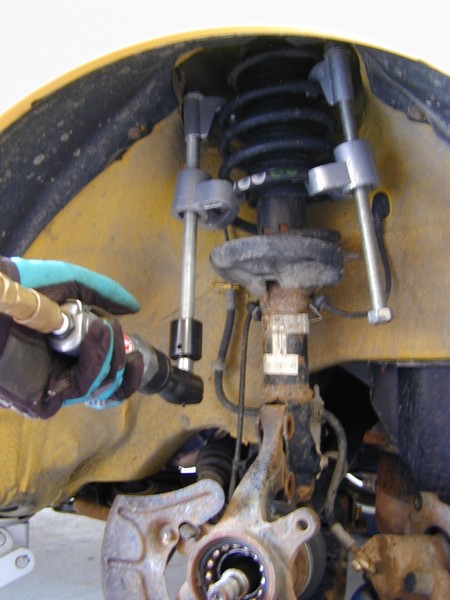
Removing these nuts normally took a lot of effort before I got my new impact wrench.

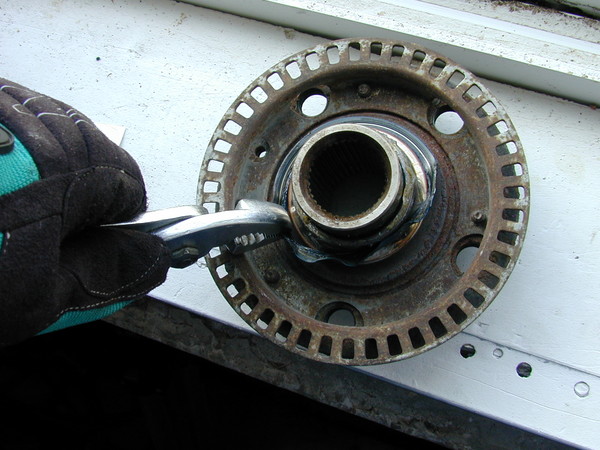
Remove the brake dust cover.  The 3 bolts are 8mm.

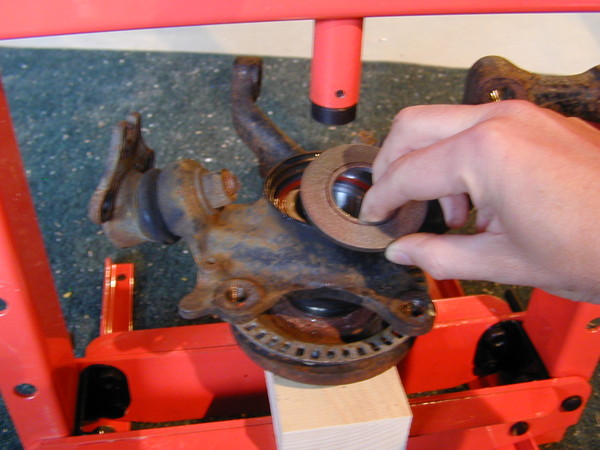
Remove the mangled outer plastic liner from the outer bearing race that is stuck to the hub.

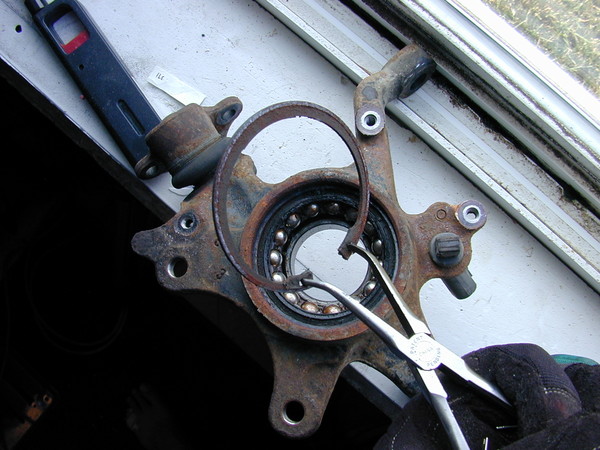
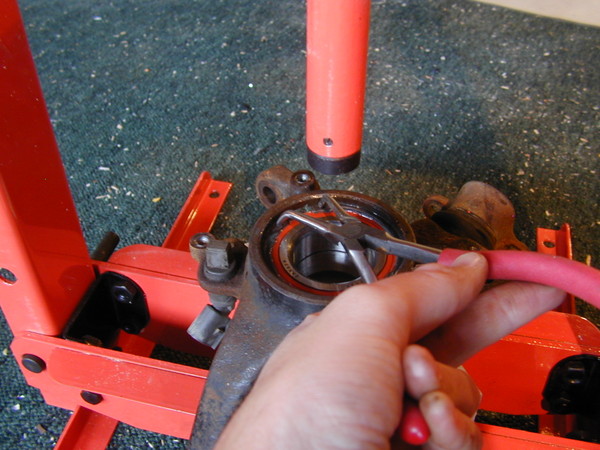
Remove the ring clip on the one side of the bearing.  I had to modify these needle nose pliers by curving the tips inward slightly so they could grip the ring clip.

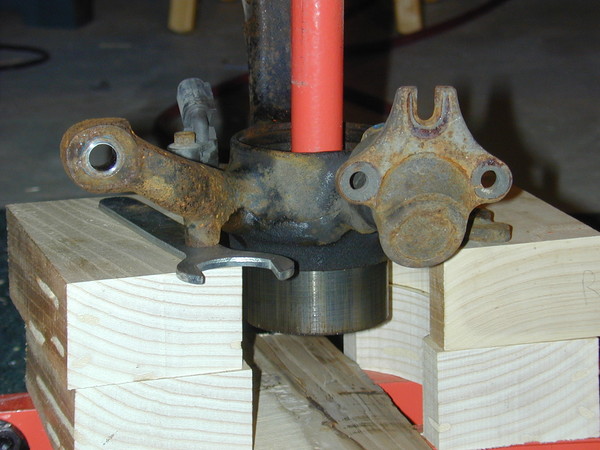
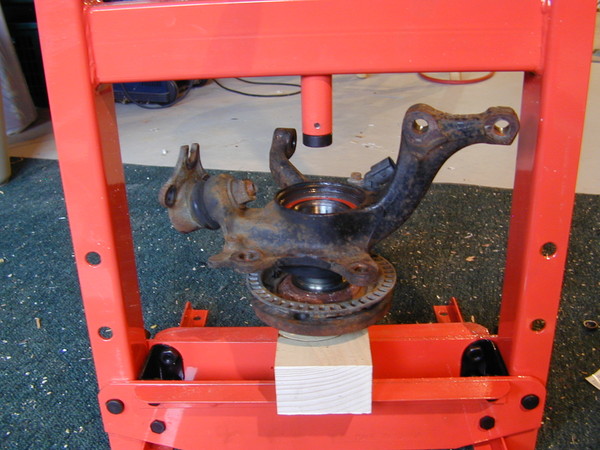
Place the knuckle face down on the hydraulic press.  I used to blocks of ash wood to allow space for the old bearing to fall out.  Harbor freight sells a cheap set of differently sized arbors for pressing out bearings.  You need to push across the entire surface of the bearing, not just the center.

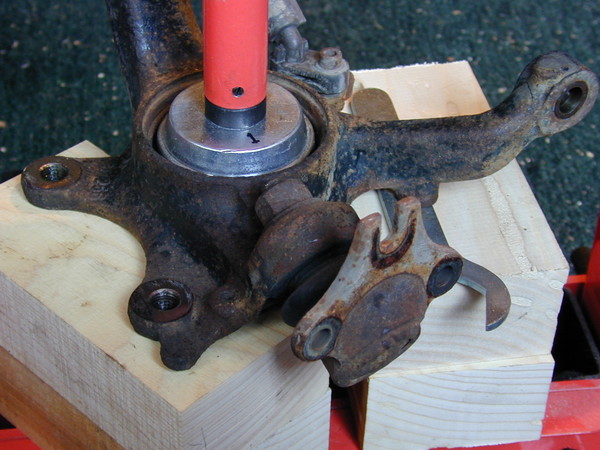
The tie rod arm needs to be raised about 1/8″ on one side so the knuckle lies perfectly flat.

Remove the ABS sensor ring from the hub.

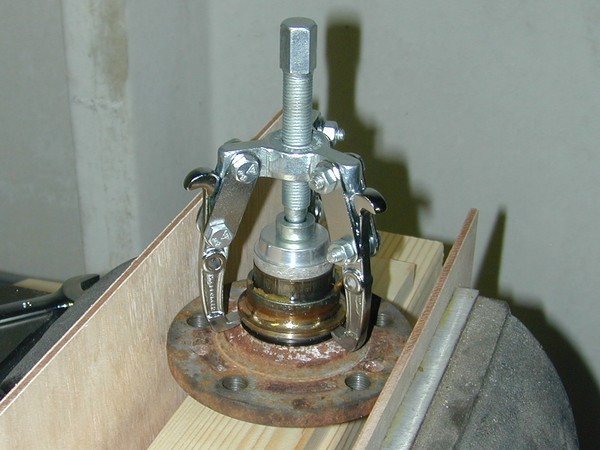
It took a bit of engineering to remove the partial bearing from the hub.

I used a puller with the jaws ground to a sharp edge because the lip is very small.
The puller needs something to push against, so I placed a small arbor on top of the hub.

This is what a bad bearing looks like close-up.
I don’t think a good bearing should have ANY rust.

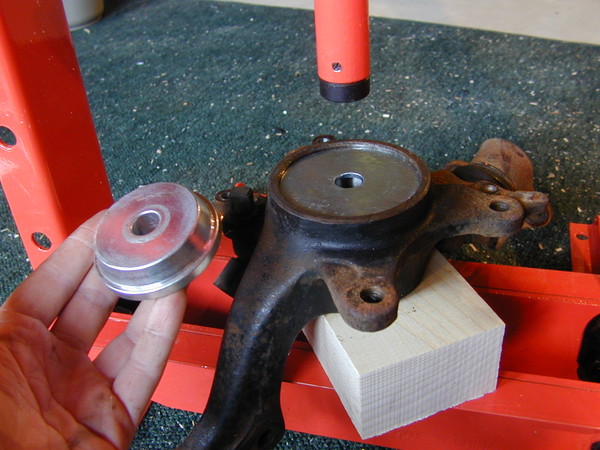
I placed the knuckle on a block of ash with the outer side facing up.
The bearing should be pressed-in with the writing facing up.
I had to cut a large washer to match the size of the bearing because I don’t want to damage the bearing when I press it into the knuckle.

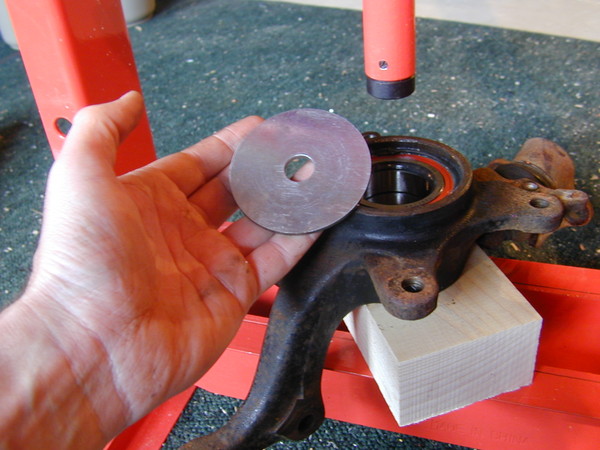
The bearing is already pressed into place in this photo, but you can see how the washer fit over the bearing and the arbor was between the washer and the press rod.

Put a new ring clip in to hold the bearing in place.

IMPORTANT: Don’t forget to put the ABS sensor ring back on before pressing the hub into the new bearing (THAT WOULD SUCK!).

Place the hub upside down in the press so I can press the bearing onto the hub.

Another tight fitting washer/arbor to evenly distribute the pressure on the new bearing.

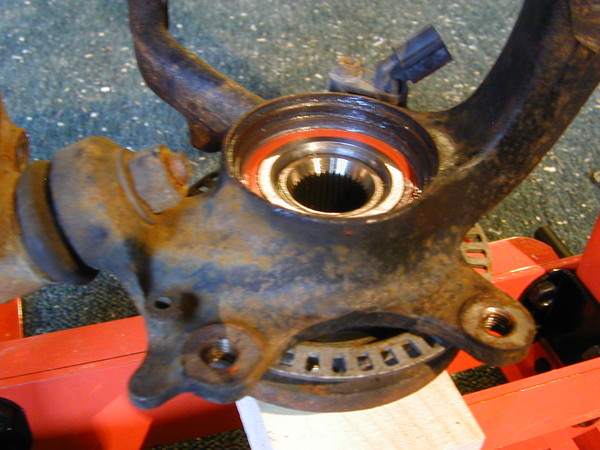
This is what the hub looks like after pressing the bearing onto it.

Time to reassemble.  You need to use the axle puller to get the hub back on the axle.

Thread the axle nut to 148 ft. lbs.
Then reverse 1 turn.
Then tighten to 37 ft. lbs.
Then tighten an additional 30 degrees.  (each point on the 12 point nut is 30 degrees)

Everything else is just the reverse of the uninstall process.

This fixed the bearing problem, but now I can clearly hear the ball joint popping… so I have to replace the ball joint.  I wish I had replaced the ball joint while replacing the bearing, it would have been easier.

Categories: DIY Tags:

Garage Trailer Lift

June 3rd, 2007 160 comments

If your into garages, gadgets, or mechanical things… you’ve got to watch this.

If you plan on doing something similar for your garage, be sure to consult a structural engineer and properly calculate loads to ensure safety.

As a woodworker, you gotta have the ability to haul lumber and equipment.  I don’t have a truck.  So, I did the next best thing and bought a trailer.  It’s an awesome trailer.  It can tip pivot (for loading a lawn tractor) and its made from lightweight aluminum.

My wife was surprised by my unannounced quick purchase.  She didn’t see the value in spending $750 for this behemoth.  Thankfully, she has realized it’s value many times over… since being used on many projects around the house.


My Volkswagen Golf GTI VR6 isn’t known as a vehicle for hooking a trailer to, but after a fair bit of effort, I was able to attach a trailer hitch.


For all its benefits, the trailer did cause a very big problem.  Where to put it?  I didn’t want to waste half my garage just to keep my trailer.  Actually, I already had a plan before buying it.  I had decided to hoist the trailer onto my garage ceiling when not in use.  So once I had purchased the trailer… I was committed to engineering a working trailer lift / hoist solution.


Initially I contemplated a manual cranking hoist (as you can see in this early sketch), but quickly changed my mind to a motorized hoist.

It is important to note the differences between a hoist and a winch:

A hoist is for lifting and a winch is for pulling.
A Winch is geared for pulling a load on a relatively level surface. A winch uses a dynamic brake that must slide.
A Hoist is geared to lift (dead weight) and has a locking brake that can support a “hanging” load.
If a Hoist can lift (dead weight) 250 lbs., then it may be capable of pulling 1000 lbs rolling weight across a hard packed surface. If a Winch can pull 1000 lbs. across a hard packed surface, it may only have the capacity to support 100 lbs. (dead weight) because the winch employs a different braking system than that of a hoist.
A Hoist is used for lifting and supporting “dead weight”.
A Winch is used for pulling (moving rolling weight).

This is the space above the garage ceiling.  I had to customize a mechanical solution that would fit in this space.  Let the engineering begin!


Luckily, I have experience with many computer graphic tools.  This allowed me to visualize my ideas and confirm the alignment of the cables through the trusses.


For those who might be curious… these renderings were done with 3d studio max and mental ray rendering engine.


Here you can see the engineered trusses of my Pulte built home.  It’s deceptively strong.  Combined with the fact that my trailer is made of aluminum and is only 700 pounds… means my garage ceiling easily carries the load.


The hoist cost me only $70 at harbor freight.  Unfortunately, as you can hear in the above video, the hoist had some broken plastic parts rattling inside the gearbox.  So I had to exchange it and install a replacement which has worked flawlessly since.  Here you can see the hoist and the beefy structure I built to ensure the it wouldn’t come undone from its’ mount.


I used lag bolts to hold most major components together.  Here you can see how I redirect the cable downward through the ceiling at each of the 4 points.


The same pulleys were used to redirect the 4 down points to the single connection at the hoist.


The strongest link in the chain… a single stainless steel ring with a very high weight rating is connected to 4 carabiners and then the 4 cables.  Do you think 3 saddles is overkill for each cable?


This is one of the 4 drop cables just after coming through the ceiling.  I added some rubber coated lead weights to maintain tension on each line when the trailer is detached.  I did this to reduce the chance a cable would fall off a pulley track.


There are 4 additional STATIC lines where I connect the trailer after it has been fully lifted to the ceiling.  Therefore, the trailer has 8 lines connected to it when it is on the ceiling.


Here you can see 2 static lines and 2 pulley lines on the left side of the trailer.

Watch my garage trailer lift video.

Check out some other garage trailer lifts:

http://panofish.net/garage-trailer-lift-3/
http://panofish.net/garage-trailer-lift-4/

Categories: Woodworking, DIY Tags:

Installing a Folding Attic Ladder in the Garage

April 20th, 2007 12 comments

Do you have unused attic space?  What are you waiting for?

This is my garage ceiling.  There is a large attic space above it and I am going to install an attic ladder to gain access to it.

Just a couple minor contraints to consider…
1. Limit the total weight of items to be stored.
2. The items must be able to withstand extreme attic temperatures.

I have the makita version of a sawzall (I love makita products).  It was the perfect tool for cutting the hole in the thick drywall.  It was a tricky balancing act while walking around on the trusses.

Attics have excellent storage space!  After finishing the attic ladder, I added insulation, plywood flooring, and fluorescent lighting.  If your like most people and have extra stuff that needs storage space, then you should investigate your attic options.  The effort required to make the space useable is definitely worth it.

Now I’m one step closer to organizing my stuff and insulating my garage.

Categories: DIY Tags:

How to Change Sandpaper on a 12″ Disc Sander

February 5th, 2007 2 comments

I find my 12 inch disc sander to be very useful.  It can make quick work out of most sanding jobs.  Ocassionally, I have used it to sand aluminum, steel, and even glass.  I discovered that glass can quickly knock off the abrasive grit from the disc.  I won’t be sanding glass anymore.

Most woodworkers probably already know this, but in my rush to replace the sanding disc, I almost forgot.  There are 2 very important things to remember when replacing a sanding disc.

1. Use a quality brand.  I once used a cheap brand and it was fine until I tried to replace it.  The sticky gum on the back remained on the metal disc and it took a very long time to remove it all!  I have used NORTON successfully and as you can see here, I am trying DEER (I hope this one works well).  I also prefer 80 grit because it is a good multipurpose grit.

2. You should not remove the wax paper entirely and try to apply the sandpaper to the disc.  Because you won’t be able to slip it between the table and the disc without the gum catching the disc before you can align it properly.

I fold the wax paper 1/3 and then slide into place like this.  That way, I can hold the 1/3 sticky section away from the disc until I can get my sandpaper centered on the disc.

Once it is centered I can press the 1/3 sticky section onto the disc.

Then I rotate the disc 180 degrees and pull back the sandpaper so I can grab the wax paper and pull it off.

Press the rest of the sandpaper in place and Bob’s your uncle.

Categories: Woodworking Tags: