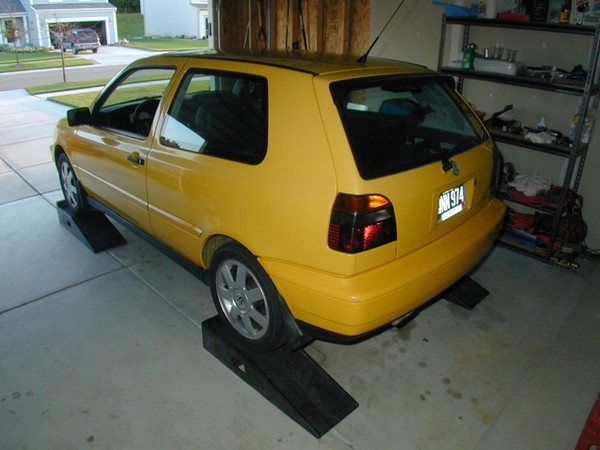
My 1998 Volkswagen Golf GTI VR6 has been an awesome car, but things are starting to fail after 150,000 miles. This is the procedure I went through to replace the right front bearing recently. The left front bearing died at 130,000 miles.
It is important to know whether your vehicle has a PLUS SUSPENSION. My 98 VW GOLF GTI is a “special edition” model which came with this. You will not be able to remove the hub on a VW with PLUS SUSPENSION without a hub puller AND you will not be able to reinstall the hub without the axle puller tool. The axle/hub splines are compressed on the PLUS SUSPENSION to eliminate backlash.
I don’t know how many VW’s have a PLUS SUSPENSION, but I guess it is not as common. The intent of the compressed splines was to completely eliminate backlash.
I needed a few specialized tools to replace the bearing. You gotta have the right tools for the job.
This tool is a tie rod ball joint separator.

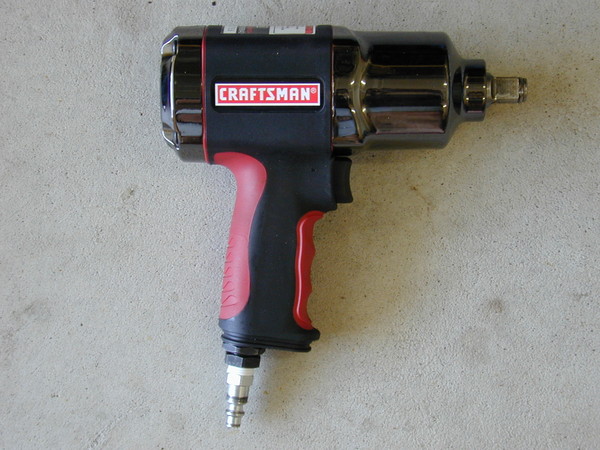
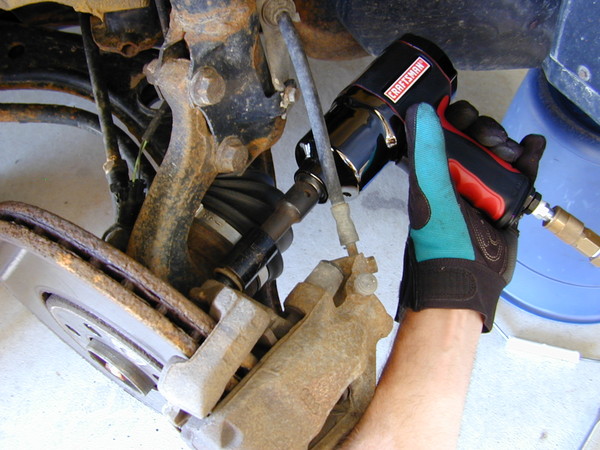
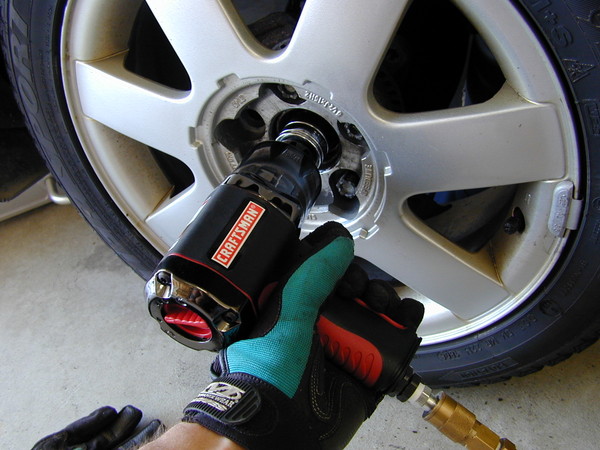
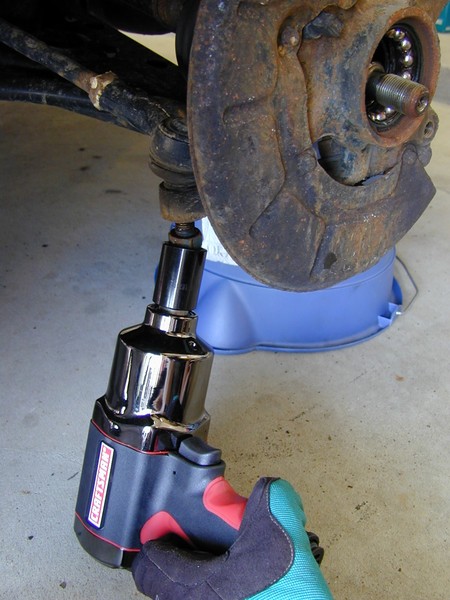
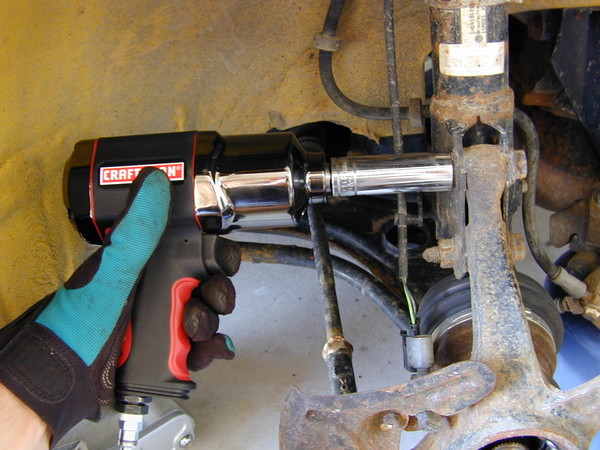
My new favorite tool… the air impact wrench. My old one had 165 ft. lbs of torque. I can’t believe I hesitated when buying this one with 585 ft. lbs of torque. It saves a lot of time and headache.
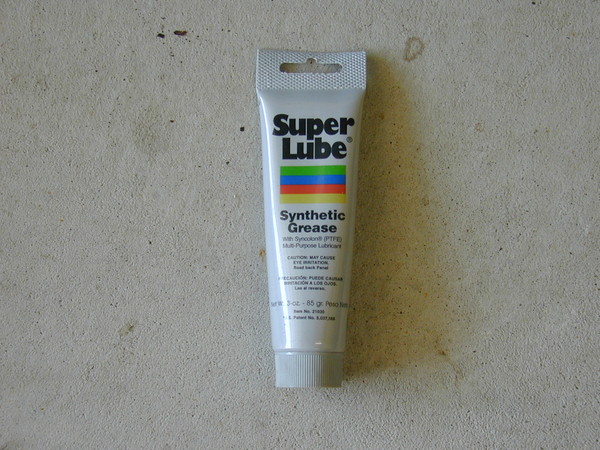
A quality grease is very useful.
An impact screw driver is a must for stubborn screws. Otherwise you will just strip them.

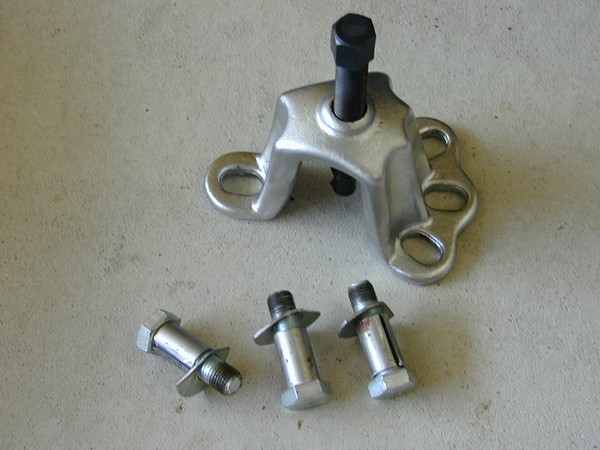
Drive axle hub press (modified). I didn’t want to pay for the expensive VW tool, so I bought this generic model and I had to modify the bolts with special washers and standoff sleeves.
Axle puller.
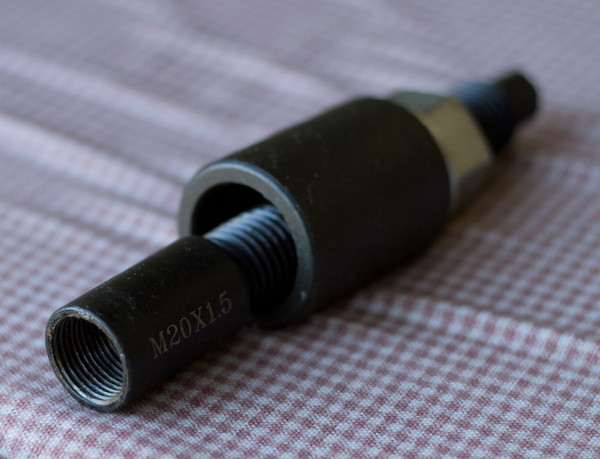
When you are reinstalling the hub… this tool helps pull the hub back onto the splined axle.
You thread the inner part onto the axle and you tighten the silver nut which pushes on the loose outer cylinder of the tool.. which presses against the hub.
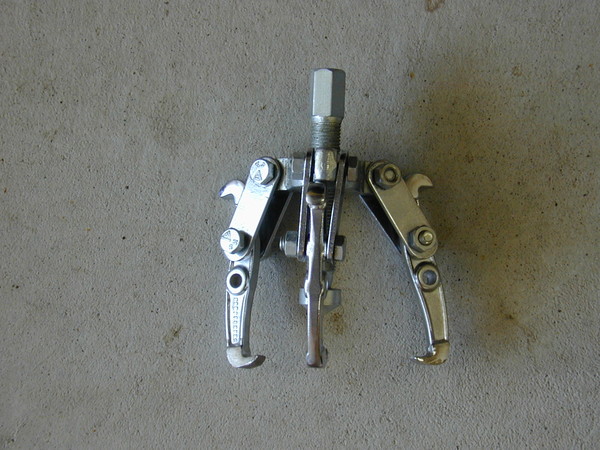
Hub puller.
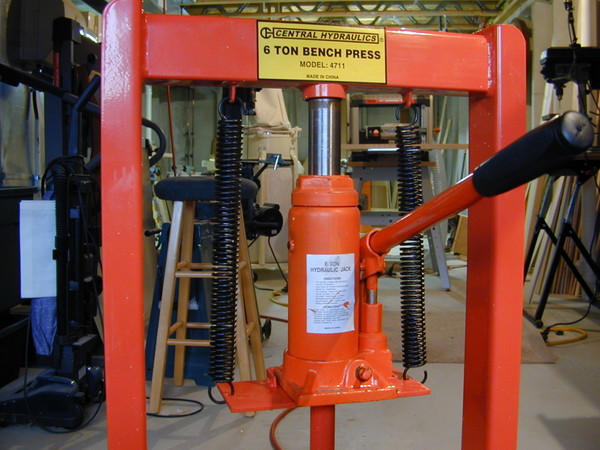
6 ton bench press. Got this at harbor freight for $60.
This completes the list of special tools needed to replace the front bearings on my golf. Of course, you’ll also need lots of wrenches, sockets, and typical garage tools as well.
If you don’t have all of these special tools, don’t even attempt to replace your VW golf front bearings.
First thing after jacking up and removing the front tire… is to press the hydraulic brake caliper piston back enough so that you can easily remove the caliper assembly. I use a bolt and a screw driver at this location as a lever.

2 bolts hold the caliper to the wheel knuckle.
This bucket is the perfect height so I can rest the caliper without putting unnecessary stress on the rubber brake line.

Now remove the single screw that holds the brake disc to the hub.

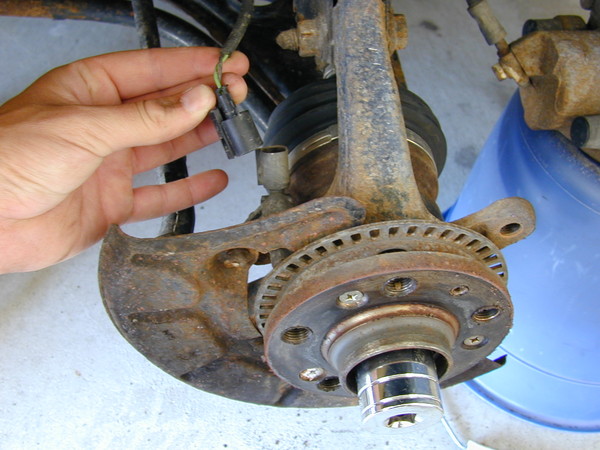
Disconnect the ABS brake sensor.
In order to loosen the axle nut… you need to put the wheel back on and lower the tire, so that the torque stress imposed on the nut is not transferred to your transmission.
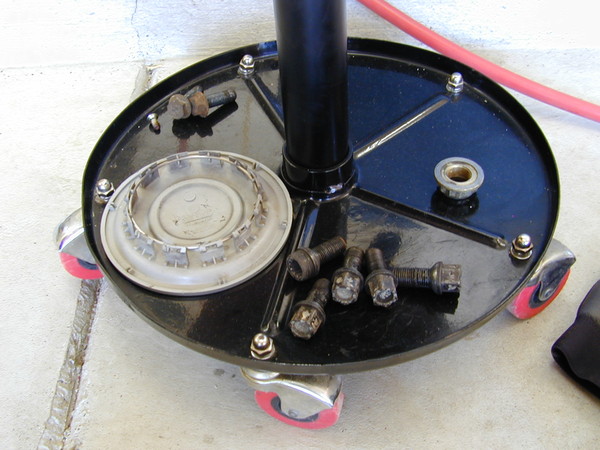
It’s important to keep your nuts and bolts organized.
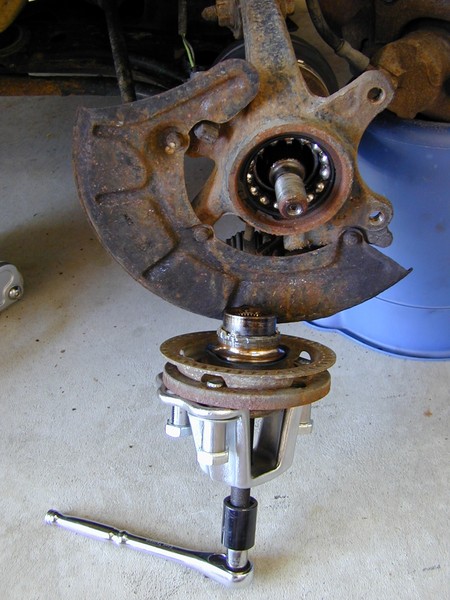
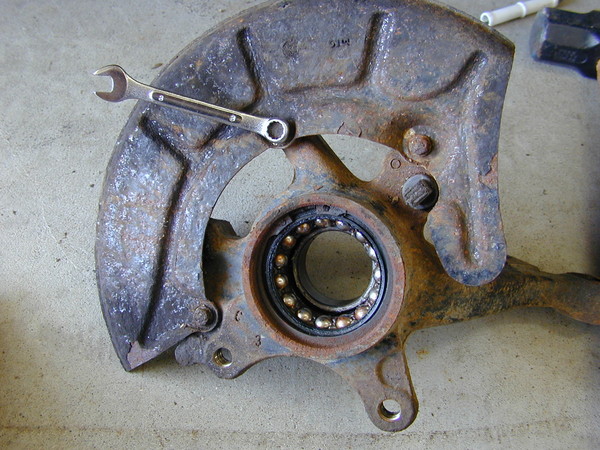
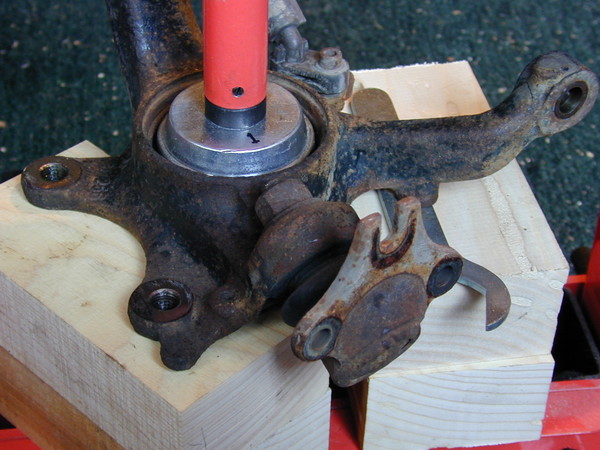
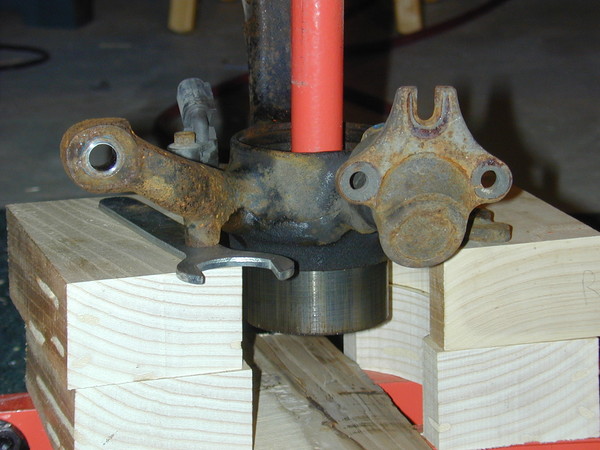
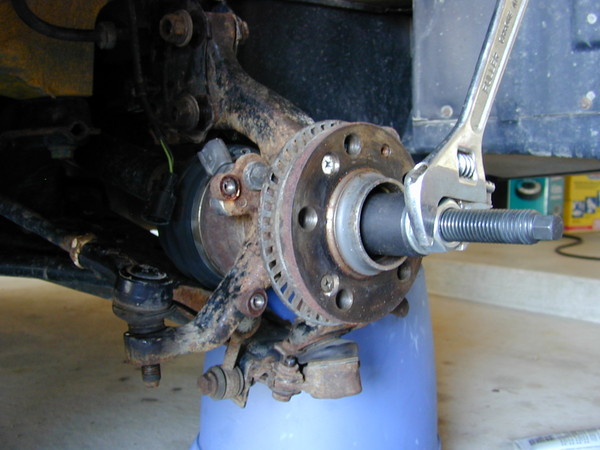
Now you can pull the hub off the axle. I greased the tool threads and tool tip and things went much smoother.

Here you can see the hub with part of the bearing stuck to it. (I remove it later).
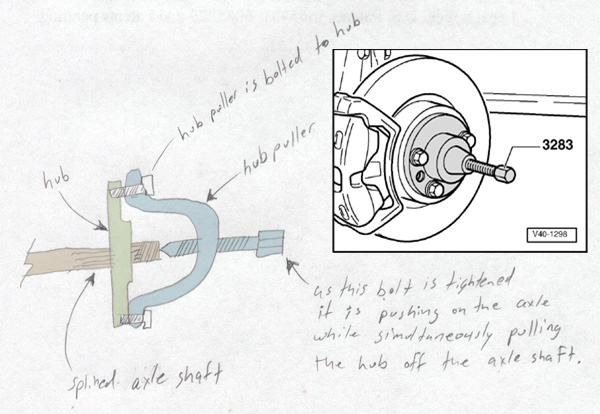
Here is a diagram of how the hub puller works to pull the hub off the axle shaft.
As the hub puller bolt is tightened, it is pushing on the axle shaft while simultaneously pulling the hub off the axle shaft.
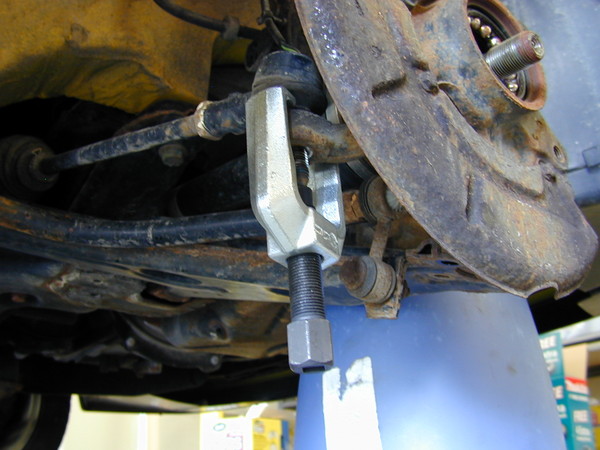
Unbolt the tie rod end. If you attempt to use a hand wrench the bolt may spin with the nut. A powerful impact wrench will save you some headache.
Use this special tool to press the tie rod end bolt off.
The bottom of the knuckle is attached to the lower ball joint which is attached to the arm by 3 bolts. I used the angle impact wrench to remove these.

You need to compress the spring before you can remove the knuckle assembly. This spring compressor was cheap from harbor freight. I had to modify it so I could invert them by welding the nuts on the end of the screw. That way, I can quickly compress the spring with a power tool.
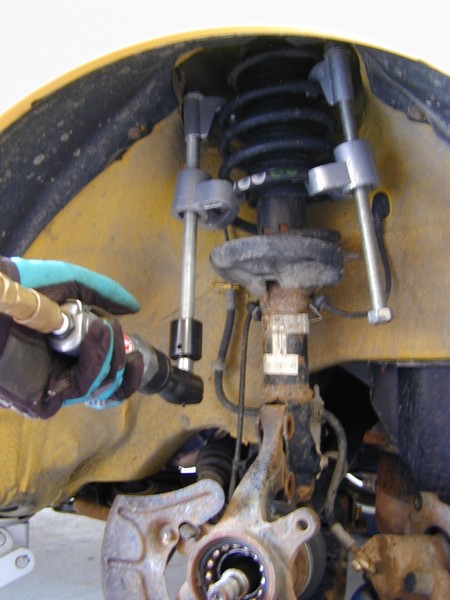
Removing these nuts normally took a lot of effort before I got my new impact wrench.
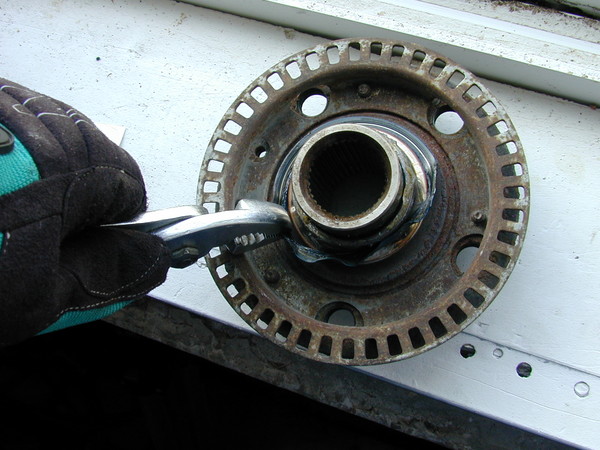
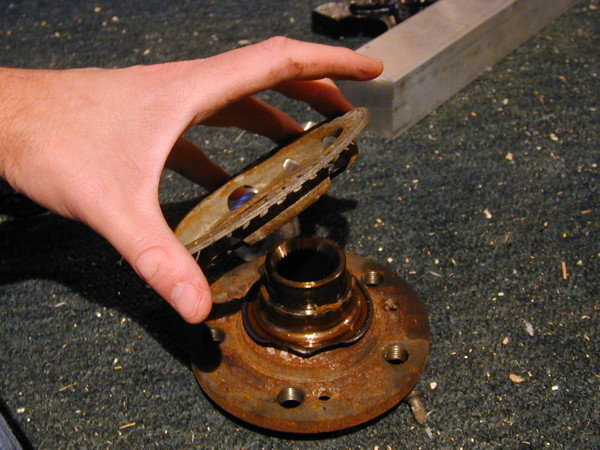
Remove the brake dust cover. The 3 bolts are 8mm.
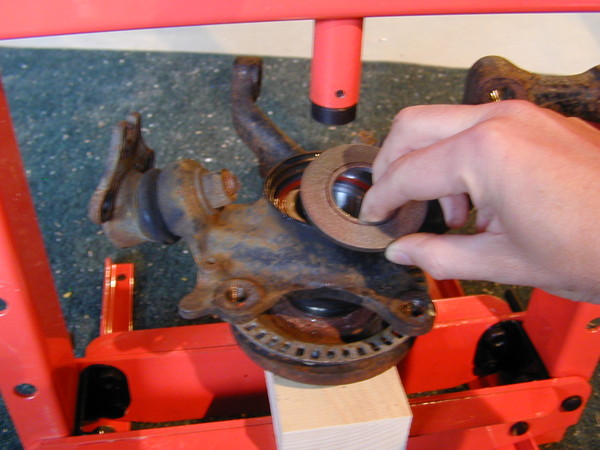
Remove the mangled outer plastic liner from the outer bearing race that is stuck to the hub.
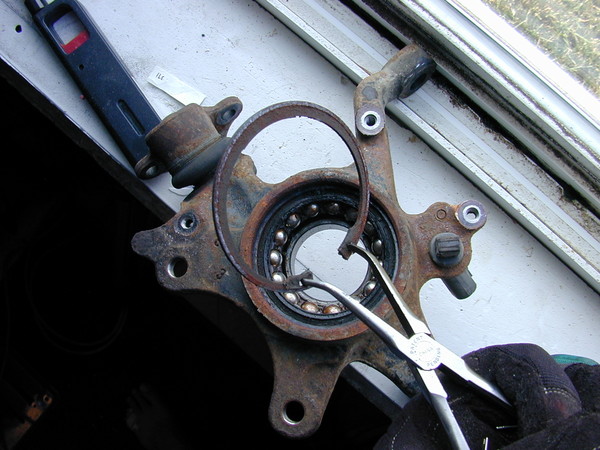
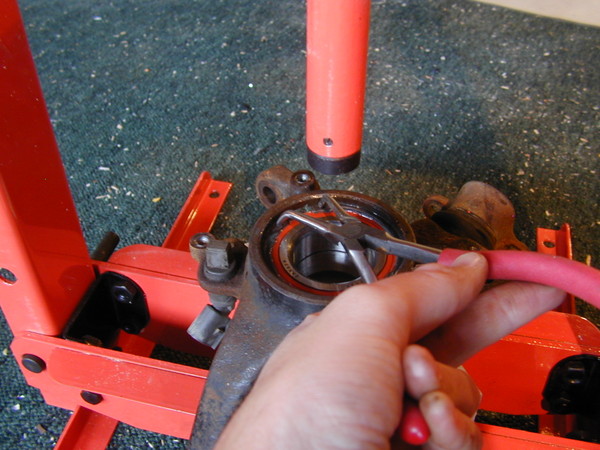
Remove the ring clip on the one side of the bearing. I had to modify these needle nose pliers by curving the tips inward slightly so they could grip the ring clip.
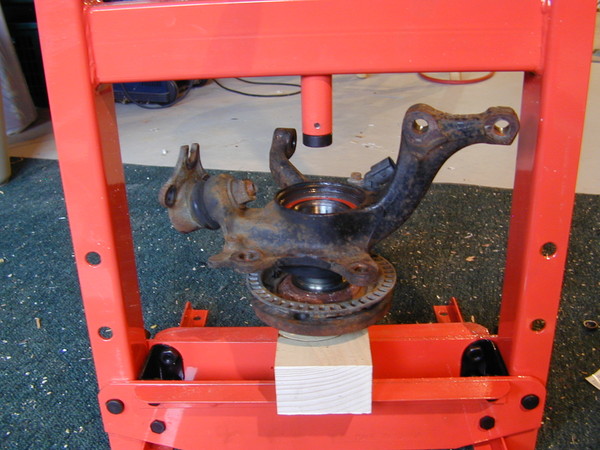
Place the knuckle face down on the hydraulic press. I used to blocks of ash wood to allow space for the old bearing to fall out. Harbor freight sells a cheap set of differently sized arbors for pressing out bearings. You need to push across the entire surface of the bearing, not just the center.
The tie rod arm needs to be raised about 1/8″ on one side so the knuckle lies perfectly flat.
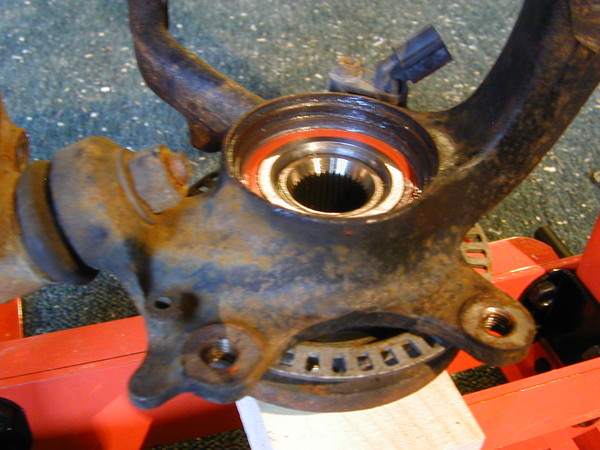
Remove the ABS sensor ring from the hub.
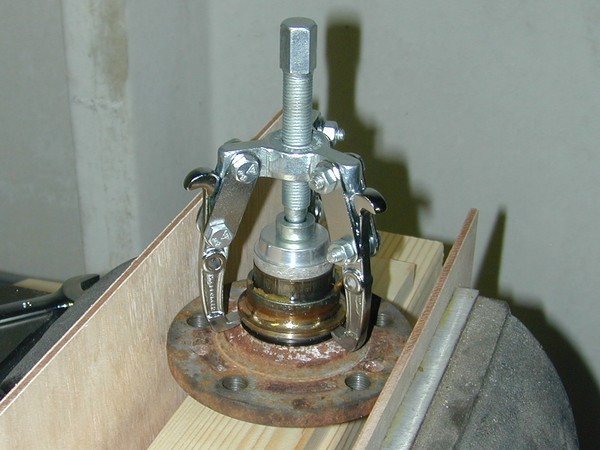
It took a bit of engineering to remove the partial bearing from the hub.
I used a puller with the jaws ground to a sharp edge because the lip is very small.
The puller needs something to push against, so I placed a small arbor on top of the hub.
This is what a bad bearing looks like close-up.
I don’t think a good bearing should have ANY rust.

I placed the knuckle on a block of ash with the outer side facing up.
The bearing should be pressed-in with the writing facing up.
I had to cut a large washer to match the size of the bearing because I don’t want to damage the bearing when I press it into the knuckle.
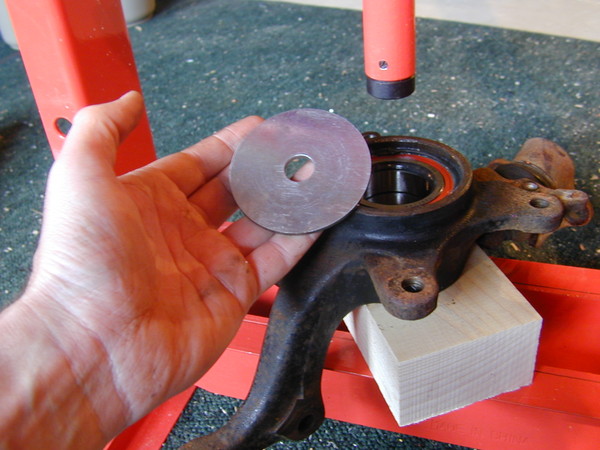
The bearing is already pressed into place in this photo, but you can see how the washer fit over the bearing and the arbor was between the washer and the press rod.
Put a new ring clip in to hold the bearing in place.
IMPORTANT: Don’t forget to put the ABS sensor ring back on before pressing the hub into the new bearing (THAT WOULD SUCK!).
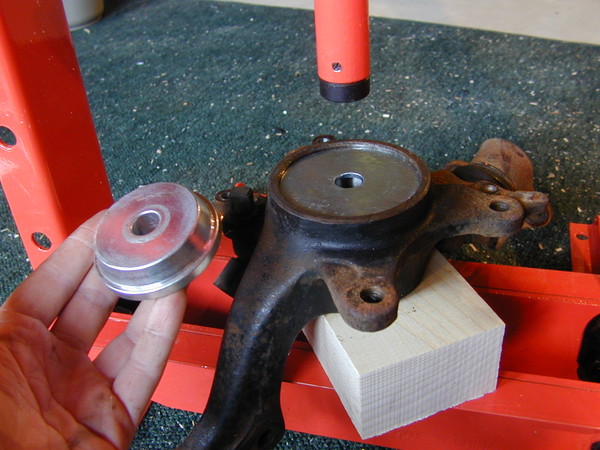
Place the hub upside down in the press so I can press the bearing onto the hub.
Another tight fitting washer/arbor to evenly distribute the pressure on the new bearing.
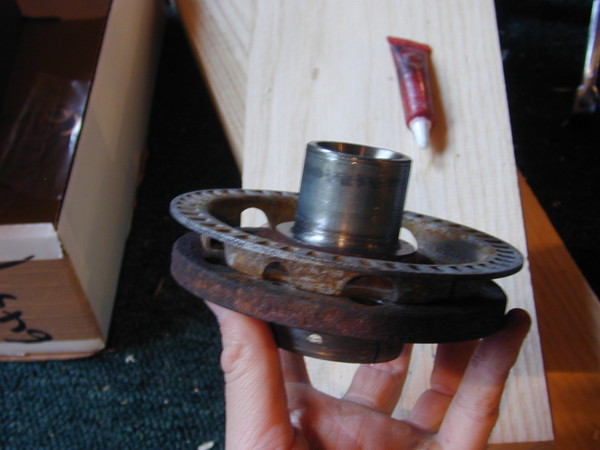
This is what the hub looks like after pressing the bearing onto it.
Time to reassemble. You need to use the axle puller to get the hub back on the axle.
Thread the axle nut to 148 ft. lbs.
Then reverse 1 turn.
Then tighten to 37 ft. lbs.
Then tighten an additional 30 degrees. (each point on the 12 point nut is 30 degrees)
Everything else is just the reverse of the uninstall process.
This fixed the bearing problem, but now I can clearly hear the ball joint popping… so I have to replace the ball joint. I wish I had replaced the ball joint while replacing the bearing, it would have been easier.

I’m confused where you say, “Time to reassemble. You need to use the axle puller to get the hub back on the axle.” What is happening in this step shown in the photo? Thanks.
I am just reversing the procedure mentioned “Now you can pull the hub off the axle”. The hub had to be forced off the axle with mechanical advantage .. and it also has to be put back on the axle using mechanical advantage. So the axle puller is using the twisting of the nut to “pull” the axle into the hub. Just like the bearings, the axle is held by an extreme friction fit. You can not push or pull the axle or the bearings without mechanical advantage. A hammer won’t work either :)
Do you think I could just use the 12-point 30mm nut to do that until I reach specified torque?
I can’t remember if the axle stub threads came far enough to thread the nut without using the special tool first. On my 98 golf, I think I had to use the tool, but later models may not have to.
Ah, that’s a great point. However, I have a ’97 Jetta GLX, so we have the same set-up. I’m finding out replacing these bearings are not a walk in the park. My hardest task thus far has been trying to get the stub axles pushed off the hubs. I had to buy the VW 3283 special tool. Bah. Tell me a little more about your axle puller tool. Does the threaded bolt have a large nut welded on the end to thread onto the axle inside the black cylinder? That’s the only way that seems to make sense to me. Thanks.
I updated the photo of the axle puller and added a description of how it works. I’ve tried to find where I bought this tool from on the web, but I’ve had no luck so far.
Ah, okay. That’s what I thought. I hope I don’t need that one too. :-) I still haven’t received my hub puller.
Do I take it right that you pull the hub from the knuckle effectively by pushing the axle with the puller bolt? Does not seem like a very good idea to me – the axle was probably not designed to sustain such pressure in that direction.
The axle doesn’t get any lateral pressure. The puller bolt pushes on the end of the axle while the outer part of the tool “pulls” the hub off. There is no other practical way to pull the hub off the axle. If you try to pull the hub without such a tool …. you could cause damage to your axle. The end of the axle is splined and the hub can only be removed or installed with the proper tool. DO NOT USE A HAMMER!
Well if the axle does not get any pressure, what does? To pull the hub, you have to push something with equivalent force – and in this case it’s the axle.
Sorry, my words do not provide adequate description of how the hub puller works… so I added a simple pencil diagram to the post (see above).
Let me know if the diagram explains the operation well enough.
It does, but that only clarifies my point. The axle is attached to the car in two places only. One is in the hub – we’re removing that; the other is at the transmission. So if we push the axle with, say, 1 ton of force, the axle is pushed into the transmission with the same 1 ton of force (save for friction forces in the axle-hub contact surface), which is bad for both the transmission and the axle. Imagine unbolting it from the transmission before using your puller – the axle would just fall out and the hub would remain seated in the knuckle.
Actually, the 1 ton of force is exerted on the axle tip and the hub… no force is applied to the axle beyond the hub. I’ve also added a reference image from the shop manual of the official VW hub puller (see above). I modified a cheap harbor freight hub puller to save money.
Are you sure that image shows hub removal? There’s no way hub could be removed from the knuckle without removing brake rotor and brake caliper first.
If force was only exerted on the axle tip, you would only be able to push axle from hub, but not hub from the knuckle. Imagine replacing the whole axle with just the outer part of it, not connected to gearbox or anything, and using your puller on it. It would be pushed from the hub, and the hub would remain in the knuckle. The only reason you are able to remove the hub this way is because axle is connected to the gearbox (and thus the chassis, and thus the knuckle), so basically the axle acts like bolt extender – it’s almost the same as if you’d have a very long bolt in the puller, reaching the gearbox.
Yes, that image is from the shop manual under the hub removal section. Agreed the image is slightly misleading, because the caliper must be removed first, however, the rotor can be left in place (or not) while using the hub removal tool. The hub is only connected to the knuckle through the bearing. This is an important point. You can not remove the hub on this 98 VW Golf (WITH PLUS SUSPENSION) without destroying the bearings. This was not a problem for me since I was replacing the bad bearings anyway. In the above images you can see the hub has compressed splines in the middle… which mate to the splines on the axle. This Volkswagen hub design is different from most other cars. Are you suggesting an alternative way to remove the hub? This is the only method provided in the official VW shop manual.
Well there are plenty of methods on the internets.
http://forums.tdiclub.com/showthread.php?t=250295
http://forums.tdiclub.com/showthread.php?t=269674
http://forums.vwvortex.com/zerothread?id=1722551
The first link uses a gear puller in the same manner as the hub puller that I used.
http://forums.tdiclub.com/showthread.php?t=250295
The second and third links are not a PLUS SUSPENSION. The axle/hub splines are not compressed and do not require much force to remove the hub from the axle unless there is some sticking due to rust (they used penetrant and a hammer!). The tools referenced in these posts are for removing and pressing the bearings.
http://forums.tdiclub.com/showthread.php?t=269674
http://forums.vwvortex.com/zerothread?id=1722551
It is important to know whether your vehicle has a PLUS SUSPENSION. My 98 VW GOLF GTI is a “special edition” model which came with this. If it were a standard suspension… I wouldn’t need to use a hub puller. I could have easily removed the entire knuckle with the bearing and hub in one piece. Then, I could use my 6-ton press to remove the hub and the bearings.
Trust me … you will not be able to remove the hub on a VW with PLUS SUSPENSION without a hub puller. AND you will not be able to reinstall the hub without the axle puller tool (see photos above).
I don’t know how many VW’s have a PLUS SUSPENSION, but I guess it is not as common. The intent of the compressed splines was to completely eliminate backlash.
Not quite. They use 3 jaw puller to push the axle from the hub, then use slide hammer to remove hub from the knuckle.
Are you sure that in that shop manual the tool is not used only to remove the axle from the hub?
How is using the 3 jaw puller, different from using the hub puller? The mechanics are almost identical, except the jaw puller is hooked to the back of the hub and the hub puller is bolted to the hub puller.
The text next to the “hub puller image” in the shop manual says “Press drive axle out of wheel hub.”
That’s what I thought. You can use the puller like this to remove the axle from the hub, but you have to use it in another way or use something else to remove the hub from the knuckle.
And of course using your puller or 3 jaw puller makes no difference. It’s just using either of them to remove the hub from the knuckle by pushing the axle that bugs me.
It is bothersome and therefore an engineering mistake by Volkswagen… because there is no other way to get the axle off the hub. In my case, the hub was removed from the axle and the knuckle at the same time. This caused the bearing to break apart and only half of the bearing came out.
What vehicle do you have?
Are you preparing to replace the bearings?
Chances are, I’m gonna be replacing a bearing on my ’01 VW Cabrio next weekend
Let me know if you have trouble removing the hub from the axle. My guess… it will not be a problem.
i have just attempted to change the bearing following this,, as i tried to pull the hub off withe the same puller as you used, it just pushed the driveshaft out the back?. is there a way to get round that??? also the bearings i have ordered do not come with the spline in the middle of it. do i have to get that pressed out then into the new one??? thanks very much
Hello Alan or others,
I have a 98 VW Golf and recently when I make turns left or right a scratching sound comes from the front end. Could this be the bearings or front axle?
@Pete
Scratching sound? Mine made a sound like nobby truck tires do on the road.. kinda buzzy. I think many 98 golfs will likely have their bearings and coil packs fail some time in their life. If your brakes look good… then I can only imagine your bearings causing such a sound. Let us know what you discover!
all u have to do is look at nut on the end of the axle is it 6 point or is it 12? if its 12 point like in all three of the links posted the car has plus suspension
When there are really complications when it comes to vehicle repairs so if you are not confident about doing it just go to the professionals and have your problems done… Ha! Ha! I am like that especially when it is a major major problem. But it is also good to know some basics when it comes to vehicle repair and maintenance.
I’ve done my wheel bearings on an 02 Jetta 1.8t. The setup you have is exactly the same. Without a proper tool, I had to pull the knuckle off and use a hammer setup to knock the hub/bearing out from behind. I would recommend against that and wish I had a proper hub puller. Also, I ended up ruining my CV boot cause I couldn’t get the axle back into the hub without a bit of force. Now I have to replace the axle. None of the HowTos I’ve seen show the use of the axle puller you have shown. After a bit of searching, I found that the part number is OTC7135A and goes for $50ish online, or $130ish with the hub puller set. Funny, it’s listed as a Ford Taurus/Sable tool.
Nice job!!! Thanks, I really needed this blog!
Do need to compress the springs on the struts for this job?
@Laga
You might be able to remove without compressing them, but I don’t thing you could put it back without compressing. So either way you will need a spring compressor to do the job.
no need to engineer a puller for the section of bearing race that stays with the hub upon it’s removal. The correct tool is known as a “bearing separator” and can be purchased cheaply in various sizes. Also, by removing the knuckle to strut attaching nuts you are disrupting the front end alignment. Assuming the camber alignment is good, you can simply remove the nut at the top of the strut retention plate and drop the assembly down thru the strut tower, maintaning alignment.
Thanks Jasper. Clearly good advice from someone with experience.
Not sure why you compressed the springs?
Think that was a waste of time but im open to other opinions………….
@lee – if you don’t compress the spring the bottom of the strut will push on the bolts holding the knuckle assembly. This makes it difficult to remove and reinstall the knuckle, but it may still be possible. I did not try it that way though and preferred to avoid the trouble since it is relatively easy to compress the spring if you already have the spring compressor tool. If you don’t have the tool, it may be worth giving it a try?
panofish.net has potential, you can make your blog go viral easily using
one tricky method. Just type in google:
Kimting’s Method To Go Viral
Dear Alan, thank you for sharing your experience! Your article helped me in very critical moment.
My car had broken bearing and I was replacing with new one. Very less I know that I have PLUS SUSPENSION.
I couldn’t place the axel back and desperately was looking for help. By miracle I found googling your article – and this saved me. I found shop who was selling axel puller and immediately purchased one – I was able to complete the repair and get my car back on road. Thank you so very much for sharing and by the way – you had done excellent work!