How to build a shed under a deck. The following youtube video covers some important factors to consider when building such a deck.
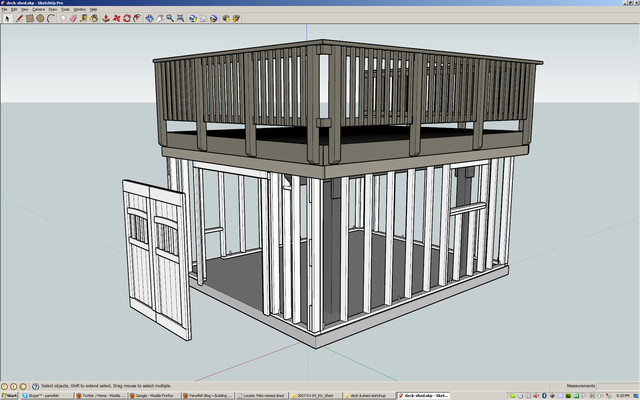
I used 3dsmax to model my deck and shed.
I recently converted the 3D deck & shed plans into sketchup so that others can benefit.
Feel free to download the sketchup file and use Google Sketchup to view, measure, and modify my shed/deck plan for your own use.
FREE Google Sketchup Plans for my deck and shed.
Back in 2001 my new home needed a deck. I designed a deck that was small and simple.
The 2 posts and single beam were massive screwed and glued planks.
I am proud of the fact that I single handedly designed and built my deck.
It was a lot of fun figuring out how to lift that heavy, wet, pressure-treated beam onto the posts all by myself.
The posts weren’t small either, when you consider they are almost 6 feet underground!
Overkill should be my new middle name.
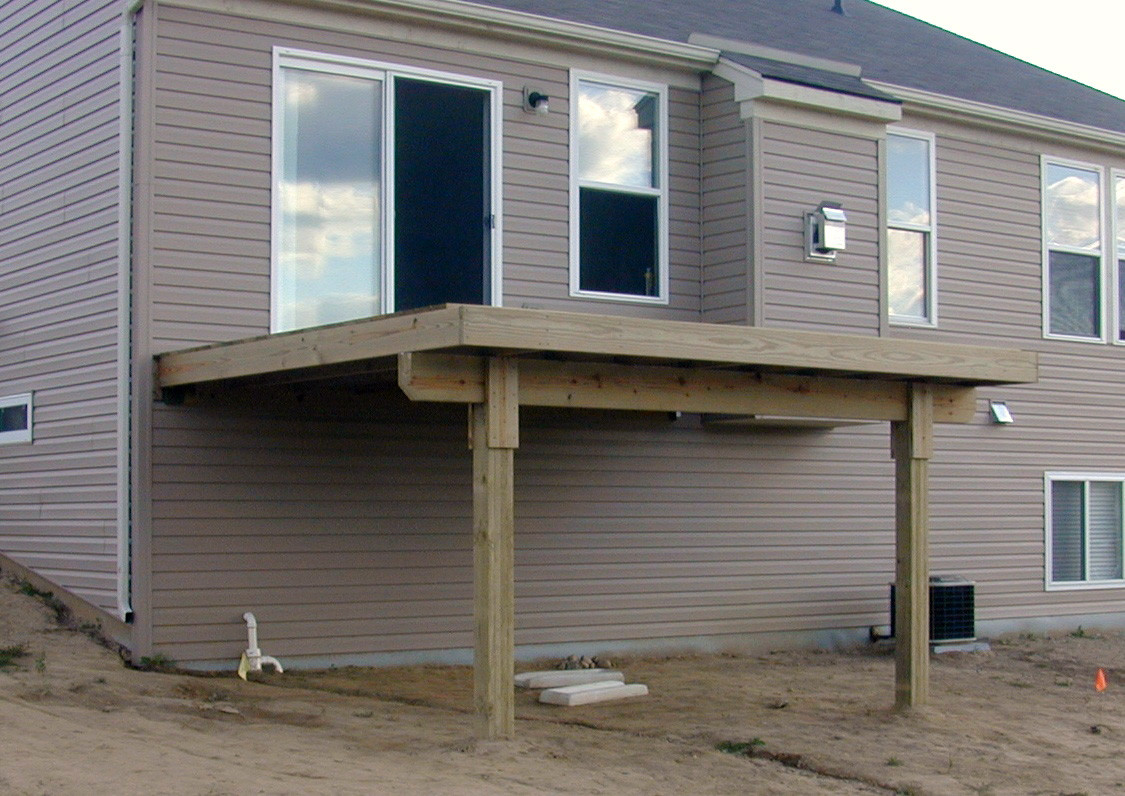
Designing my deck with only 2 posts, allowed plenty of space for a shed.
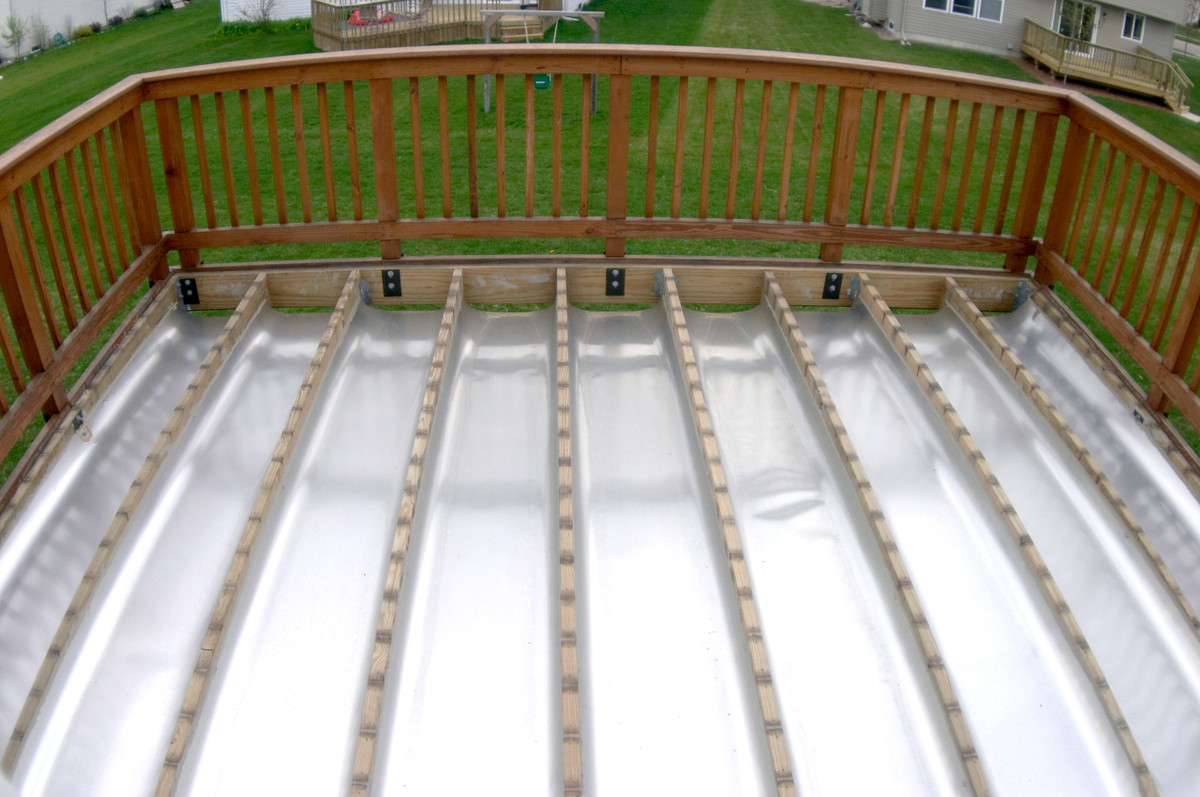
The first stage of building my shed was to build the roof within the joists of the deck.
This stage took a long time and a bunch of thought.
I decided to build an angled trough system with curved sheets of aluminum flashing.
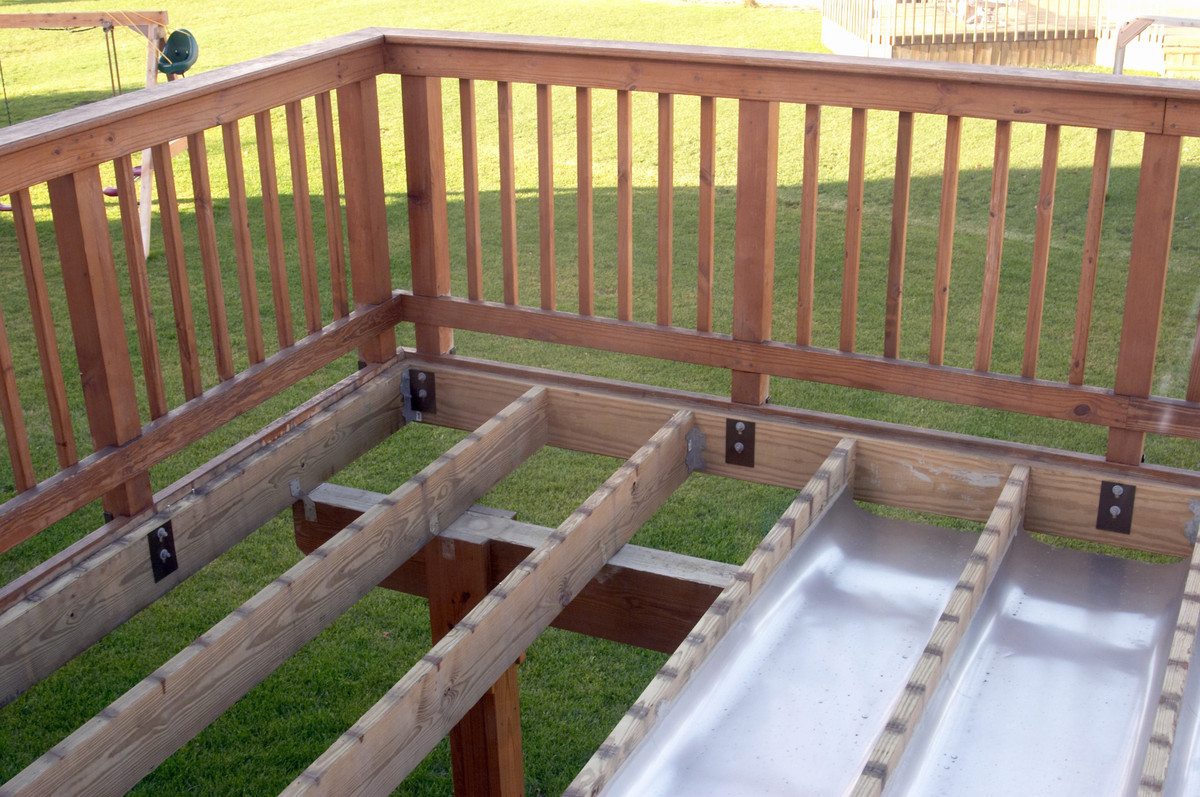
Here you can see the underside and the gradual slope for rain runoff.
This was an incredibly tedious process. I used a large quantity of industrial caulk to seal the aluminum to the joists.
This tedium will be worth it because it maximizes my sheds headroom.
I’m 6′ 3″ and there is just 1″ of headroom from the joists.
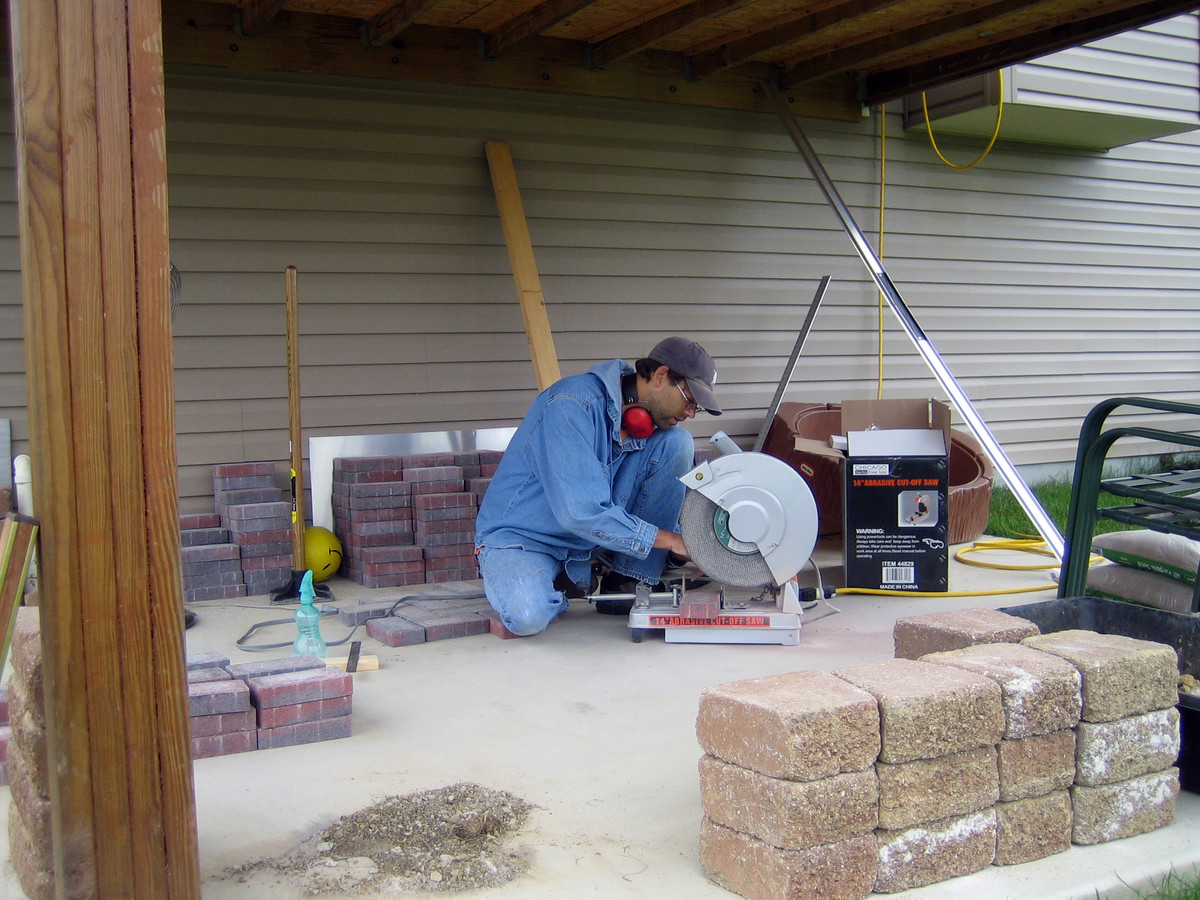
The next time I need to cut bricks… I’ll get a diamond blade.
It sure took me a long time to cut them with an abrasive disc.
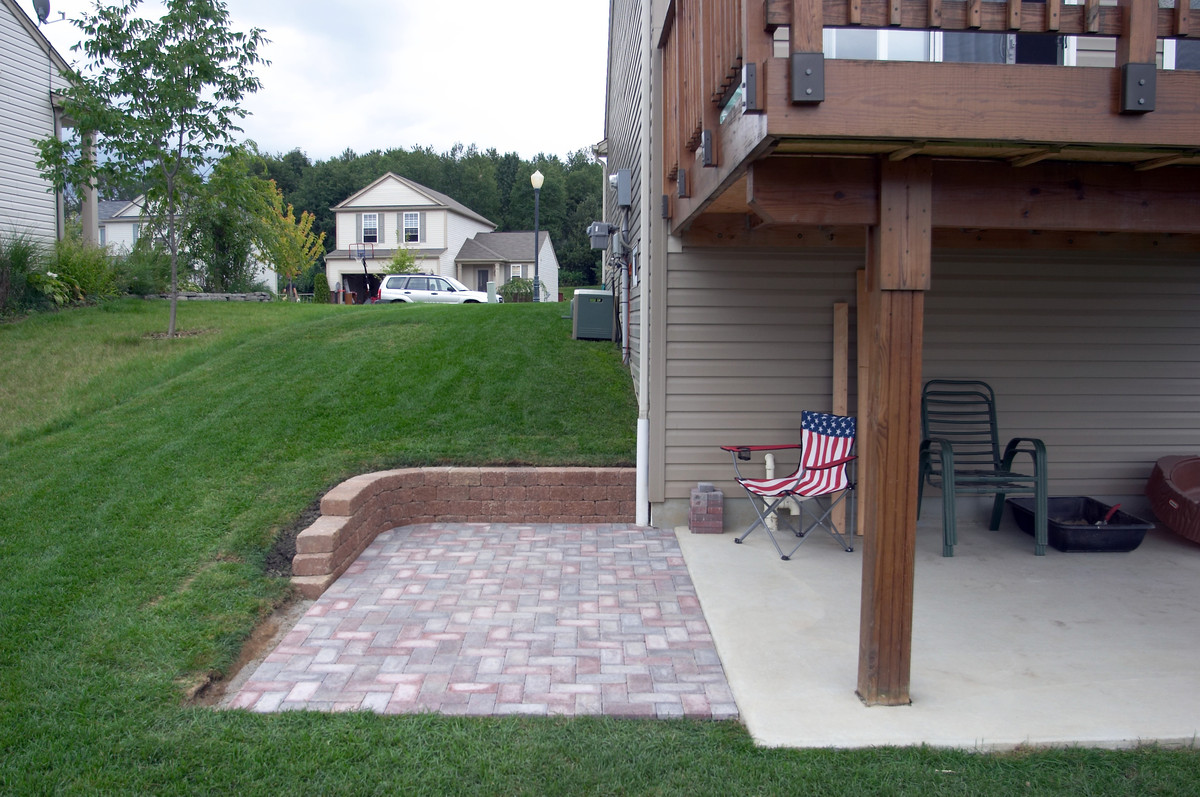
The shed roof survived the winter and showed no leaks. Now the next stage. I had a concrete pad poured. I decided to put my shed entry on the left side of the deck, so I had to dig the hillside down and create a patio for the doorway. This summer was incredibly hot and moving my sprinkler lines was no fun.
It’s took an eternity to figure out how to build the walls. I had to leave a gap between the walls and the deck. I expected the concrete to heave in the winter.
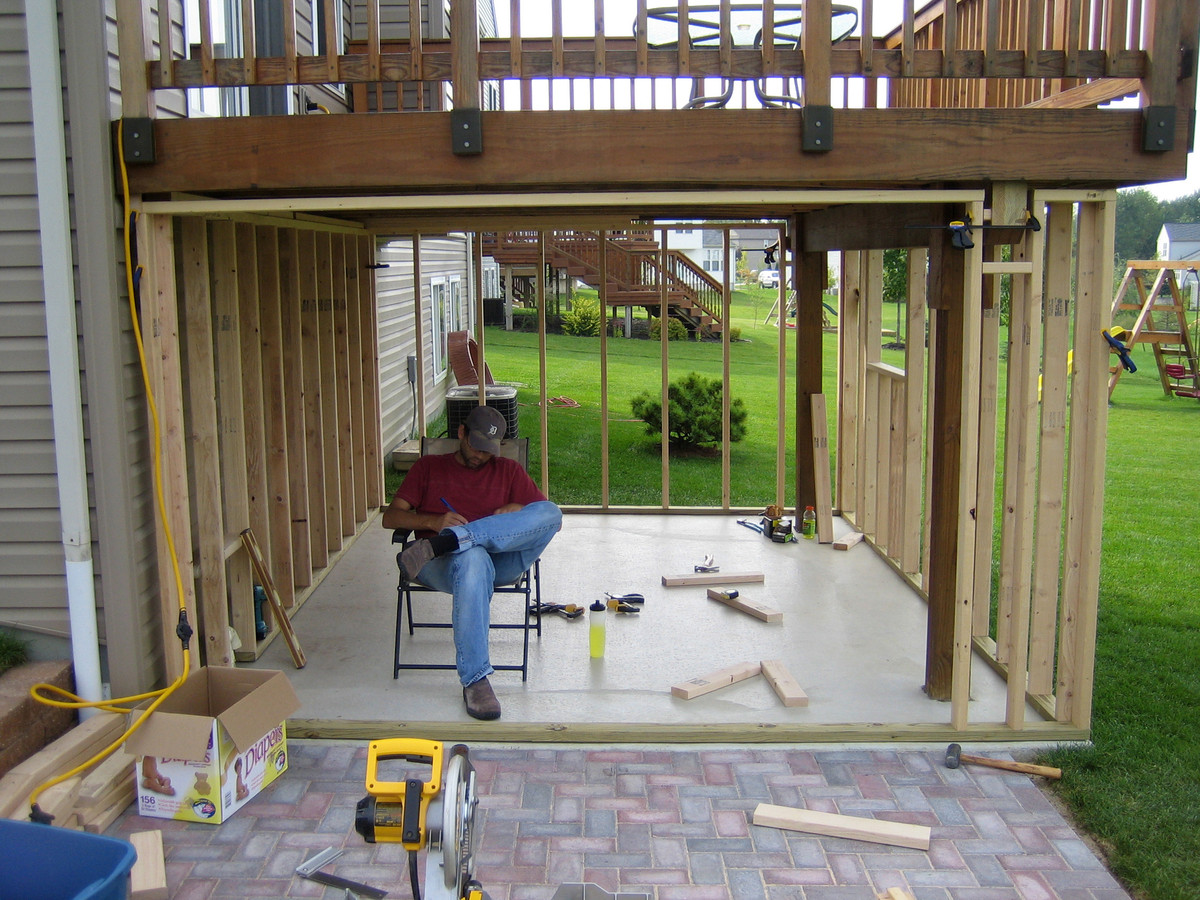
My excitement is building and I can see the light at the end of the tunnel!
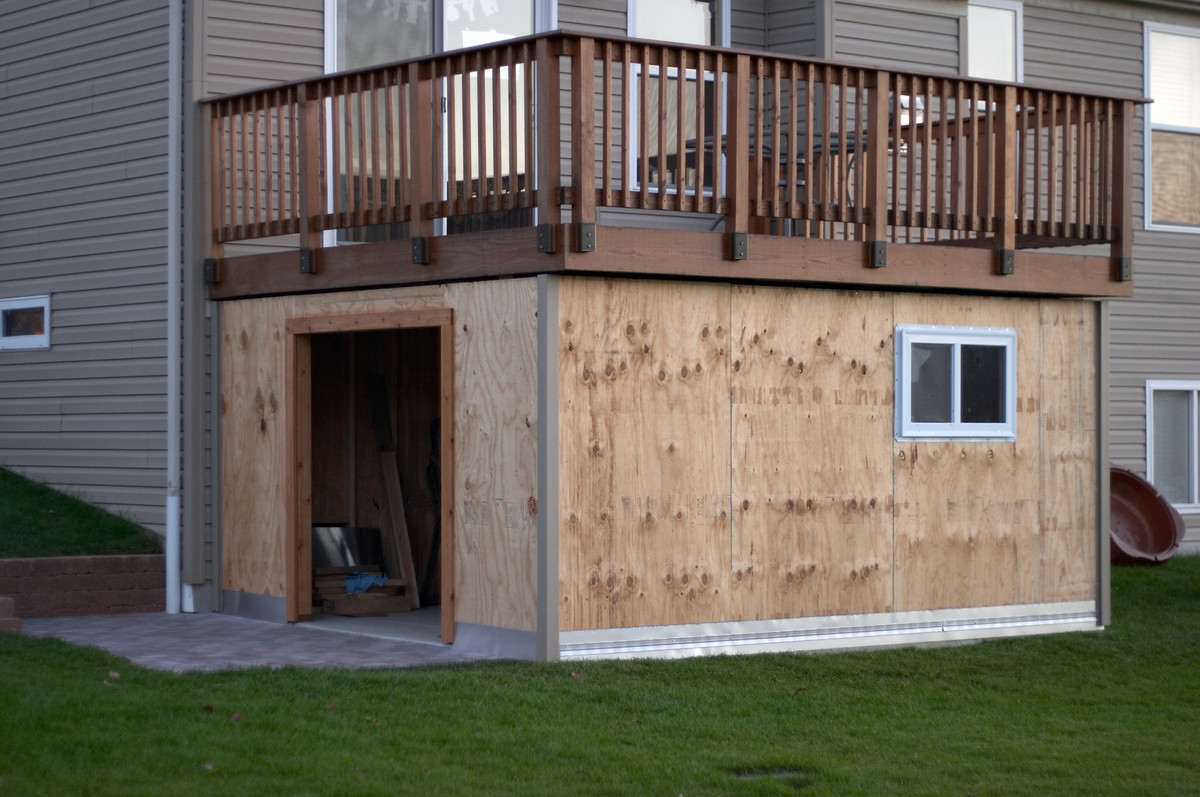
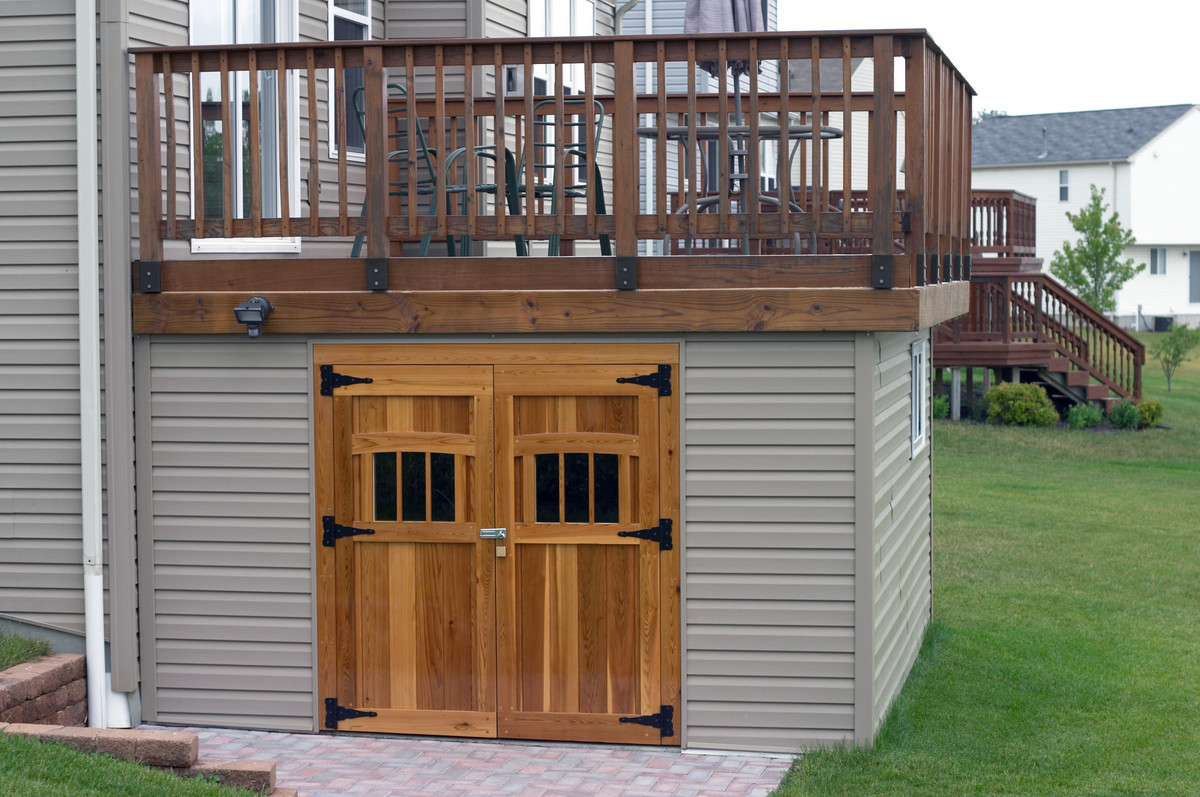
The doorway is short and non-standard. I had to build a custom double door.
Another month or so would pass before I could finish my custom shed doors, but I’m happy with the result. I wanted my shed to look as nice as I could make it… so I wrapped it in matching vinyl siding. My trailer-lift project may have been my most gratifying project, but my shed has been the most useful. Good thing I allowed space for the concrete to heave in winter… because it did just that!
YAAA! My garage is clean and useable again.
Hi Alan, Would you have a list of materials you used? We are hoping to make a deck just like yours next Spring. Thanks
A local building center is closing and I hoped we could get materials while they are on sale.
Sorry Donna. I do not have a list of materials for the shed.
I the efforts you have put in this, thanks for all the
great posts.
Can I get this project done for under 5000.00 including concrete slab
The slab cost the most at about 2000 and the materials cost probably another 1-2 thousand at most. So you should be able to do the same for around 3-4 thousand.
Hi:
I have seen people talking about putting tapered furring strips and screwing aluminum or fiber glass roofing under the deck to let the water flow. Did you consider that ?
Great job and video by the way. Very inspirational. Thanks.
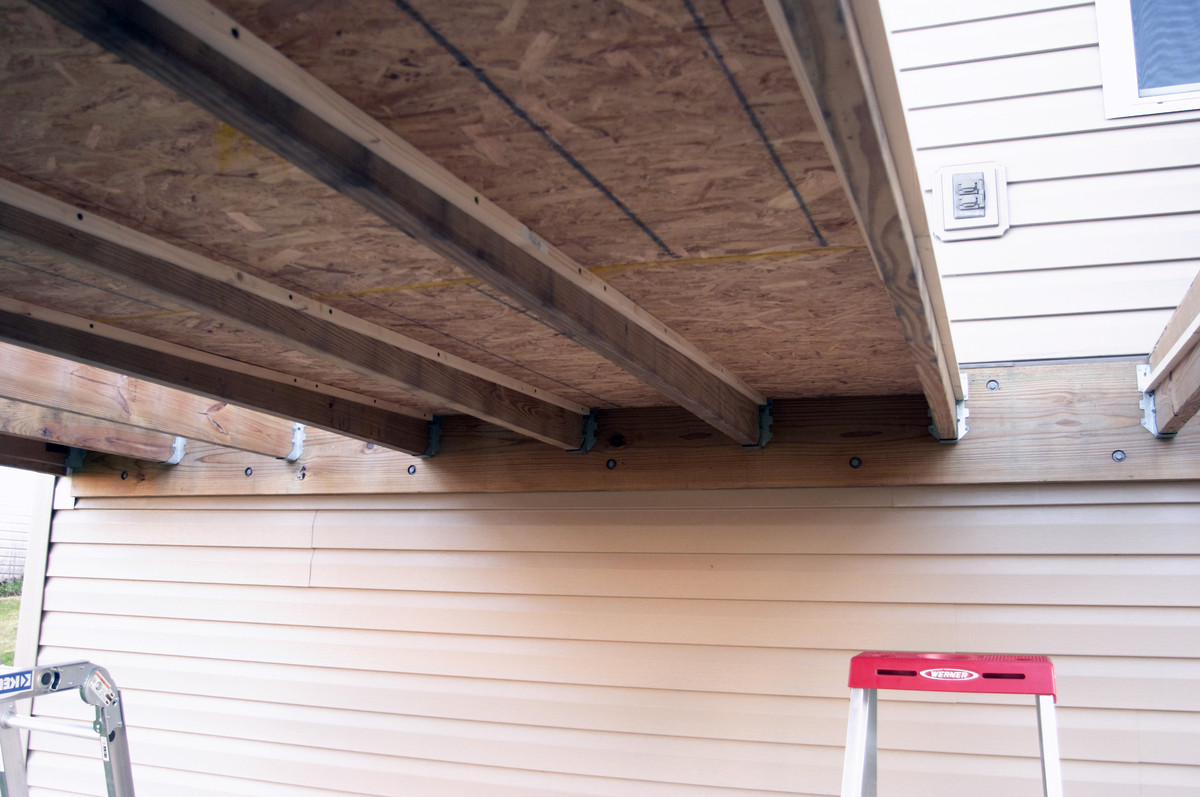
I did consider those options but, I preferred my custom approach because I did not have to put anything under the deck joists. That would have reduced my ceiling height. The available ceiling height was already perfect for my 6′ 2″ body. If I had slung any other solution under the deck… I would have to bend over or duck while inside my shed. As it is.. I can stand comfortably with a few inches to spare and not have to worry about hitting my head. Thanks for the positive comments!
What is the size of your concrete slab of the shed ?
I can not get you plans to download. My question is how did you build your walls to account for the heaving of the concrete? My concrete heaves every year.
The walls are not attached to the deck in any way. I added deck skirting to overlap the walls and hide the gap. This keeps all rain and wind out the the shed. I even put some foam into the gap. When the concrete heaves in the winter the walls have room to move up and never contact the bottom of the deck. The walls are bolted to the concrete and if you attach all 4 walls to one another… they are surprisingly strong. Most amazing of all, anyone that looks at the shed from the outside or the inside… can’t tell that the wall are not attached. It looks as if they are. I just tested the sketchup plans download and it still works fine. The file that downloads is a .skp file for sketchup.
Very nice and relevant work to my own project. As in your case, it is imperative that my under-the-deck shed stand completely independent of the deck structure. You mention that you have attached the walls to one another at the corners to create strength but it is not apparent in the SketchUp drawing, video or still photos how that was accomplished. Long screws? Lag screws? Special brackets?
@David. I’d have to check, but it is probably just the same nails I used to build the walls with.. that’s all you’ll need. Never been a problem.
Very nice work, love what you’ve done so I’m trying something very similar. What type of wood did you use for your storage doors?
@Kyle… I used tongue and groove cedar for the inner part of the doors and cedar planks around the edges. Then I applied heavy multiple coats of epifanes varnish. That stuff is the best for outdoor wood. I have refinished the doors only once in 16 years. Still look great.
I cannot open the FREE Google Sketchup Plans for my deck and shed. Can they be accessed elsewhere? Thanks!
Following your design and plans. How much would this project cost to do on an existing deck without the electricity part? Just looking for a rough ball park figure.
It’s been so long since I built it, not sure I can give a good ballpark, but I can tell you the biggest expense was paying someone else to pour the concrete slab. Cost me about $2000 for that, but it makes a huge difference… and I think its worth it for a solid foundation. The doors were the most time consuming… because I custom designed and built them, but they didn’t cost much .. just some plywood backing and cedar planks. The epifanes finish cost about $160 to finish the doors. Vinyl siding wasn’t expensive… just had to find the matching style and brand to match my home. The bulk of the building is 2x4s and plywood sheeting. Not expensive but cumulative cost of all those materials including a window… probably $1000 added to the concrete…. So I wild guess, I probably spent $3000 at the time. I would add another 500 to that for inflation if built today.
That helps a lot thanks very much! And you said if a guy does a concrete slab to leave a 1” gap between the top of the shed and the deck joists correct to account for the concrete heave? Does that number change depending on climate and severity of the winter? I love in the heart of Minnesota and it can be brutaliy cold some winters. Thanks again, you’ve been a tremendous help!
Definitely leave a gap. The strength of ice to lift is insane. Like a square foot could lift an elephant. So it will destroy your deck if it can reach it. Not sure about your area, but I’ve never had a problem with my gap yet.
In a warm climate as in North Carolina where the temperature seldom goes below freezing, is it necessary for the shed structure to be totally separate from the deck structure? In the past 12 years we have never had freezing temperatures and no ice has ever accumulated on my concrete pads.
Hi Alan,
This is fantastic, fantastic work! I am trying to build essentially the same thing- but more or less freestanding (against a tree), where the roof deck becomes a kids play area. Curious if you had thoughts on adjustments that would make your design work as a freestanding structure? Aside from extra posts, does wind start to play a factor?
Nice! I like it. Do you still have that sketch up? I have tried downloading it with no success.
Hi. Great video but my deck already exists so I cannot get the aluminum flashing put in. Any ideas on how to seal under my deck before I
Build in the shed?
Thanks
Joe
@Joezanello… I built my deck first.. then when I decided to build the shed… I removed all the decking boards and installed the angled plywood and installed the curved flashing. Then I reinstalled all of the deck boards. The other way is to build an aluminum slanted roof under the deck joists, but you will lose height for your shed. It depends on how much room you have under your deck of course.
Hello,
I really liked the way you build the shed under the deck. How much do you think it will cost to hire a contractor to build one for me? I don’t think I can do it my myself?
Thx
Omar
Good morning, is your google sketchup still available? I am having trouble accessing through the link.
@Jen The link is still valid. The sketchup file is for an older version of sketchup when it was owned by google. http://www.panofish.net/img/2007-01-05_My_Shed/deck-shed.skp
Awesome shed build there! It looks like your concrete slab is right at grade level. How did you prevent water from running under the walls? It looks like just a foam strip and treated lumber on the slab, then plywood and aluminum flashing around the outside of each wall frame. Do you have something sealing the aluminum flashing to the concrete?
The yard has pitch downhill and the slab is slightly above grade. Interestingly, in the 17 or so years since I built it… water coming underneath has never been a problem. In heavy rains… sometimes a few earthworms crawl onto the slab and into the shed, but not too often.